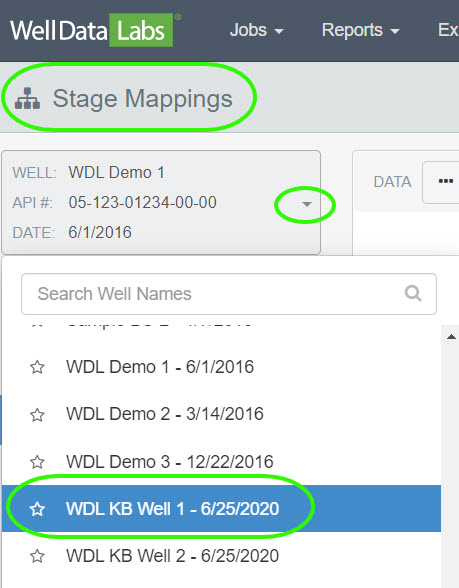
Open the Stage Mappings page and select your well from the drop-down in the upper left-hand corner of the page.
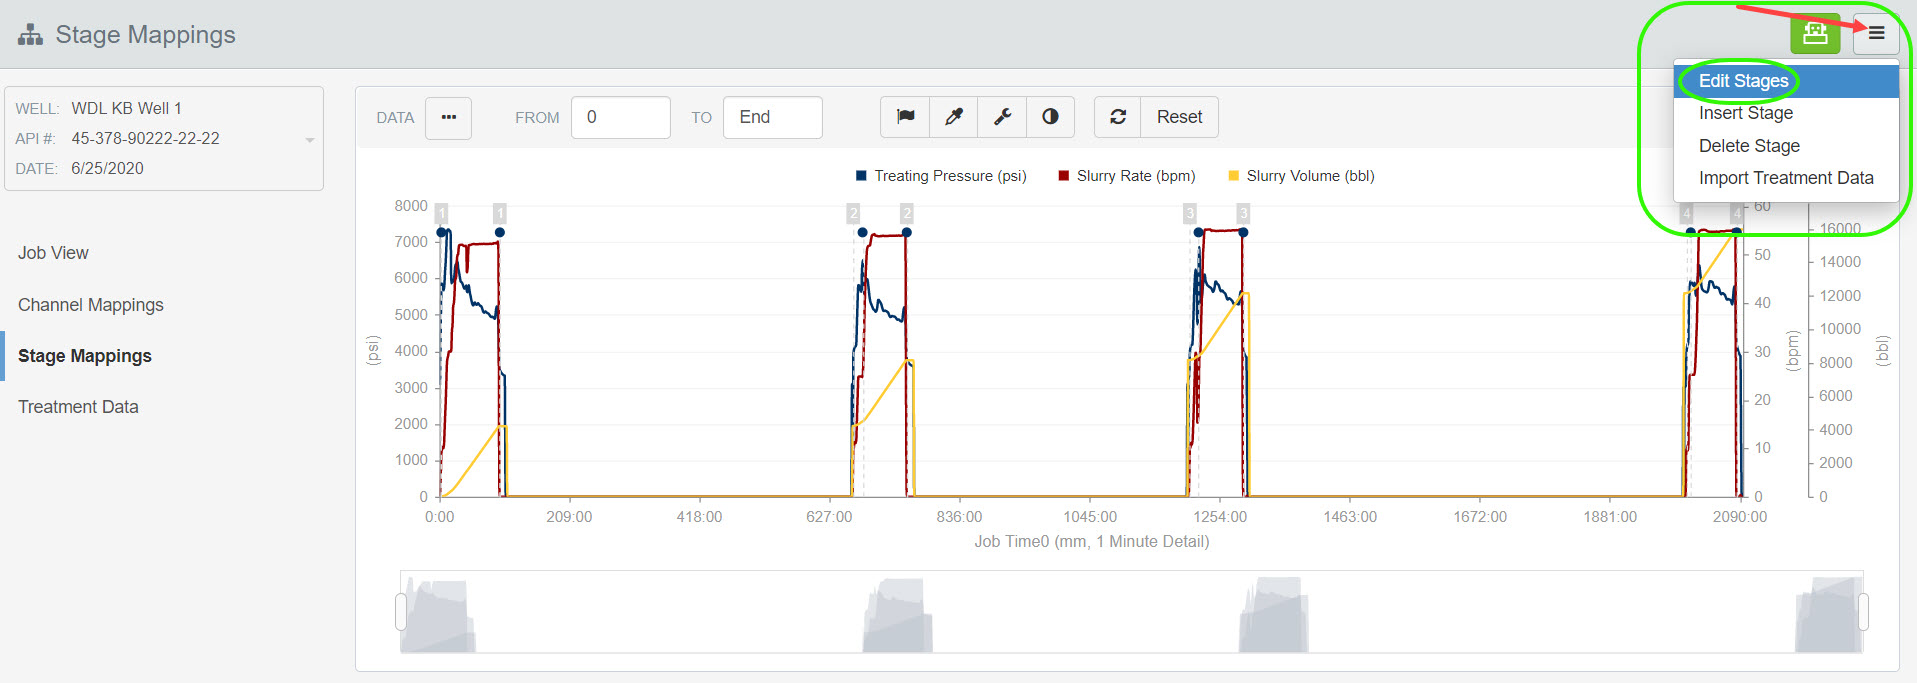
Click the 3-bar button in the upper right-hand corner of the page. Select Edit Stages.
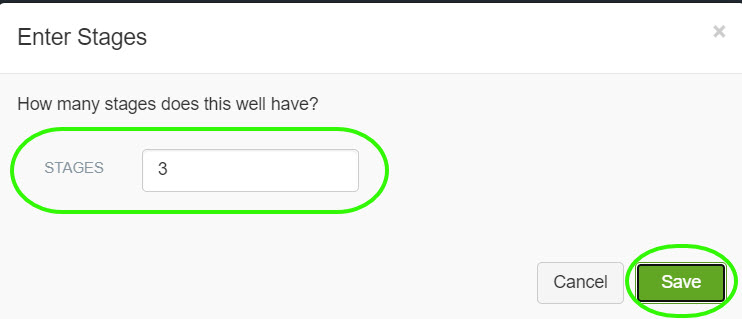
When the Enter Stages window opens, enter the number of stages you would like and click Save.
A confirmation window will display, click Continue.

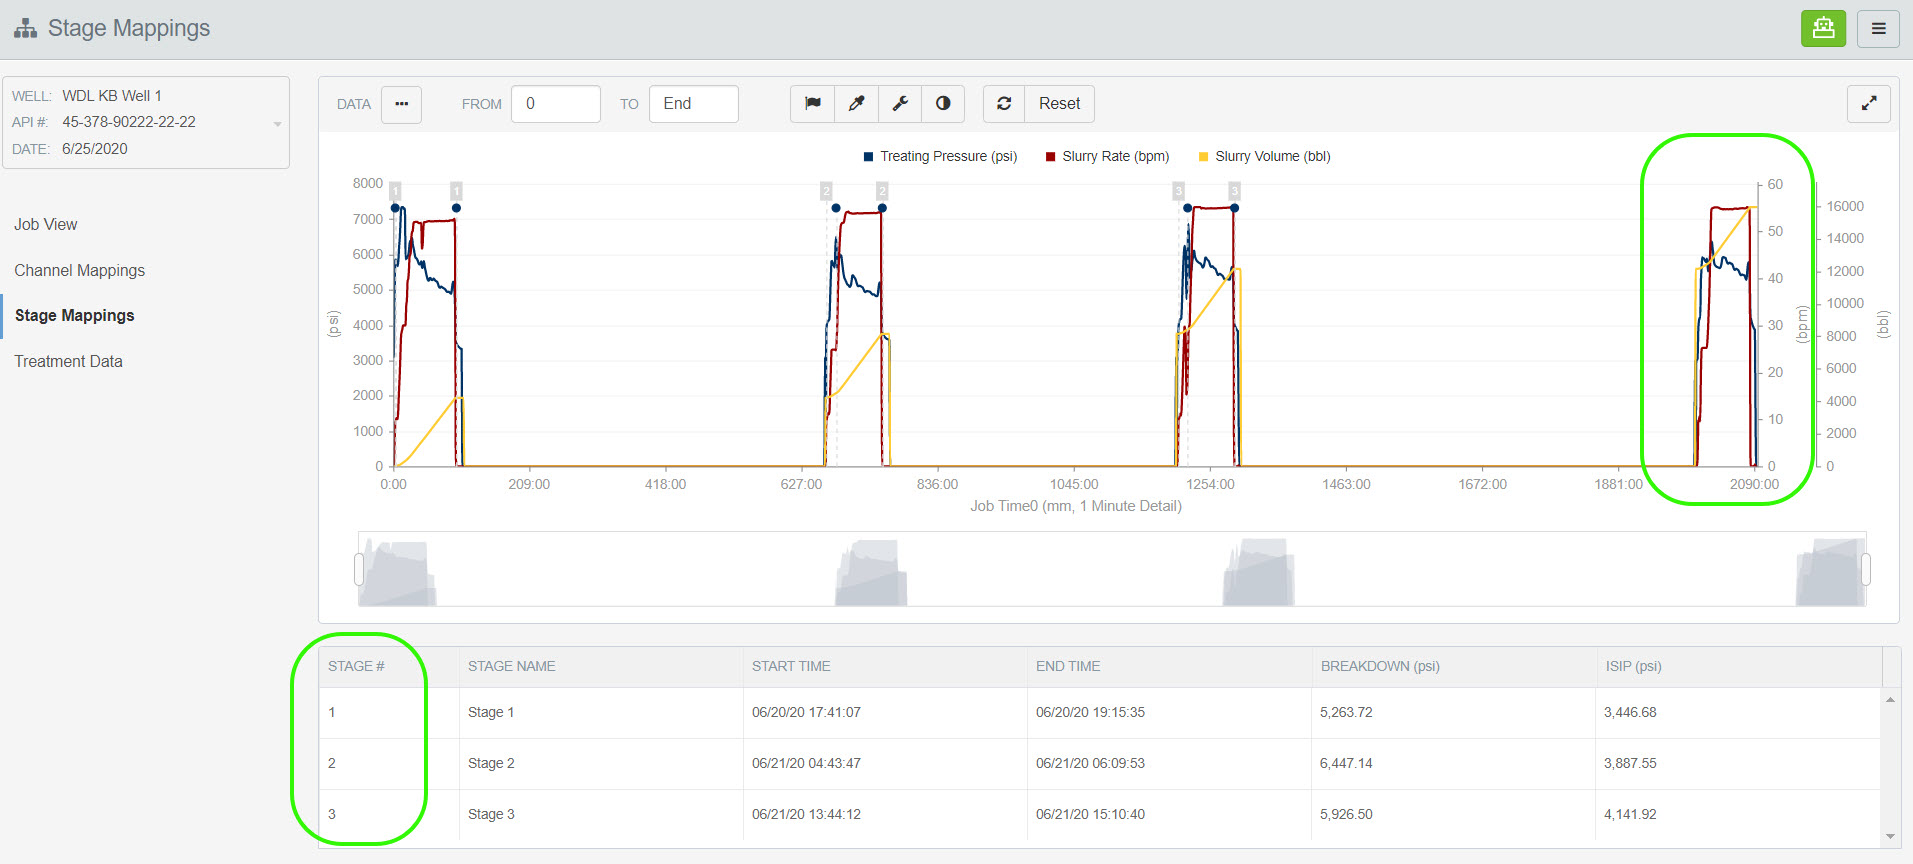
The stage times have been deleted and the grid has been updated displaying 3 stages.
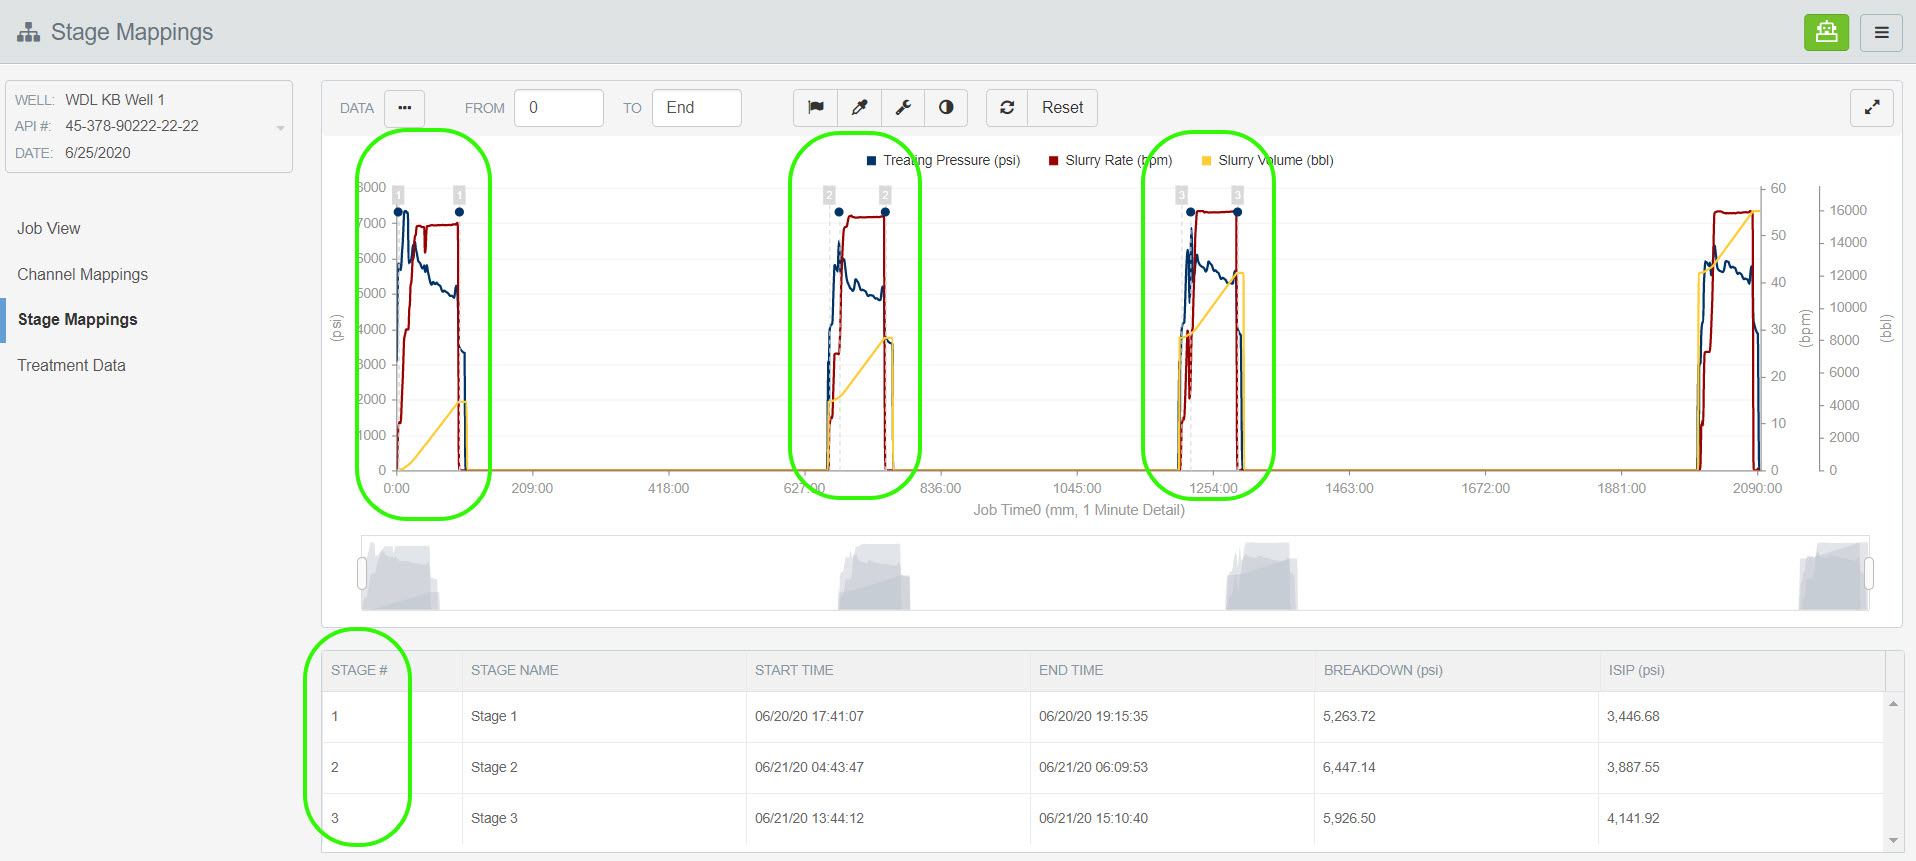
**Please Note: Stage 4 still displays on the chart but the stage times are no longer mapped.
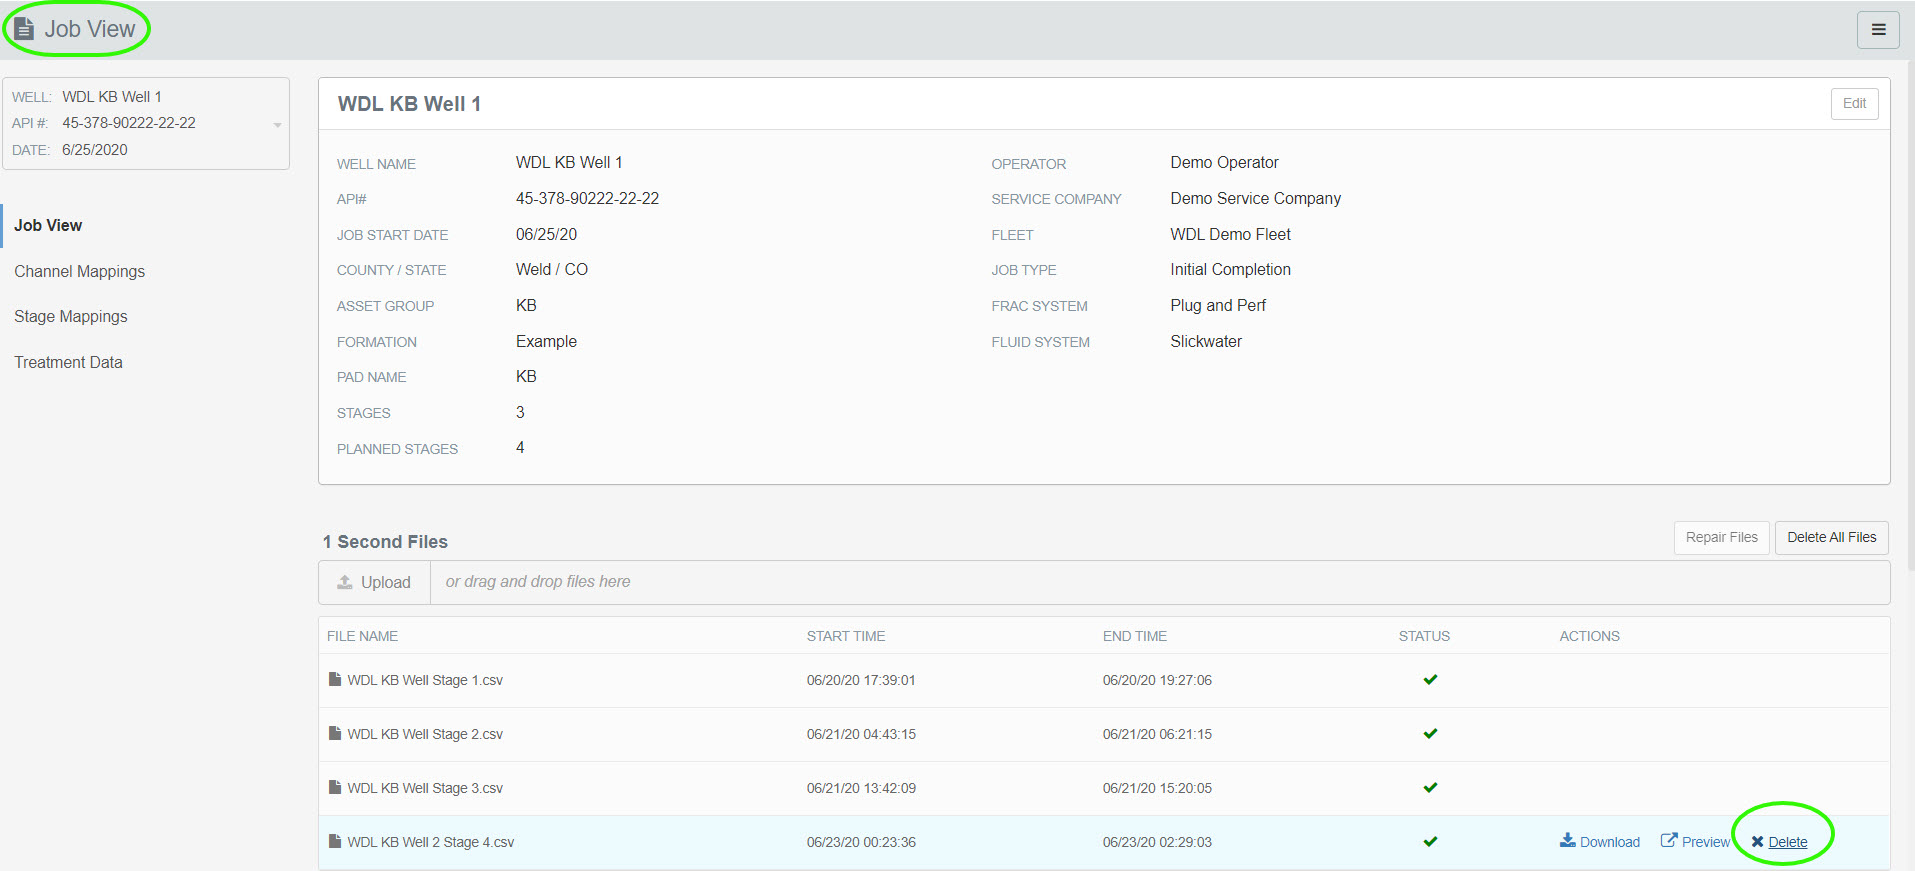
In order to remove stage 4 from Stage Mappings, the csv file will need to be deleted. Go to the Job View page, and click "Delete" in the actions column next to the file.
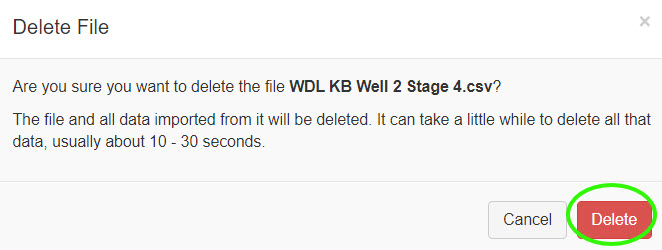
Click "delete" to confirm.
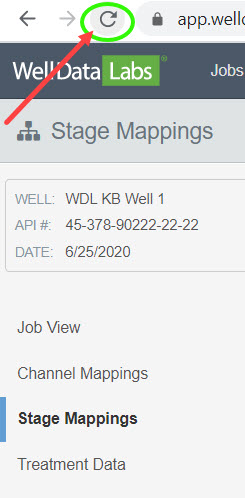
Return to the Stage Mappings page and refresh your browser.
Stage 4 no longer displays on the chart.
