What can we help you with today?
Get help straight from the team at Well Data Labs...
Well Data Labs Real-Time Frac
Testing the Real-Time Client V10.4 with Fracpro
Updated 2 weeks ago
Before you begin streaming Real-Time data to Well Data Labs you may want to test out the WDL Real-Time Client and its connection to Fracpro. Below are step-by-step instructions about how to do so! If you have any further questions please do not hesitate to Contact Support!
Configure the WDL Real-Time Client for a new Test Stream:
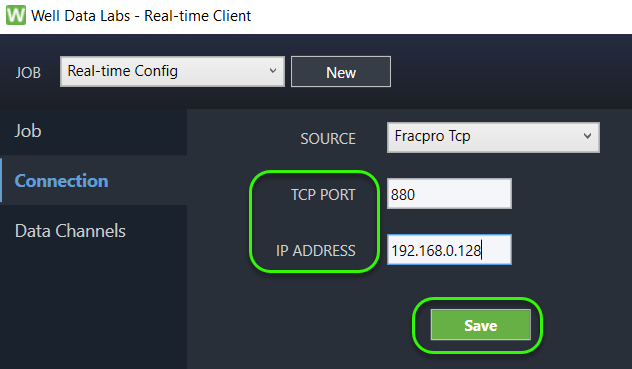
Unzip and open the wdl.rt.client folder, double click on the wdl.rt.client and it should automatically launch. You will need your API key provided by WDL and the IP Address of the machine running Fracpro to create and configure a new test stream.
Select 'Fracpro Tcp' as the Source.
TCP Port '880' is the default
If you're running the WDL Client on the same machine running Fracpro, you can use 127.0.0.1 for the IP address.
If you aren't sure of the IP address for the Fracpro machine, follow these steps:
On the Fracpro machine, type Windows Key + R to bring up the 'Windows Run' dialog box.
Type 'cmd' and click OK to bring up the Windows Command terminal.
In the Windows Command terminal, type 'ipconfig' and hit the Enter key
The number you'll need is called "IPv4 Address".

Type the IPv4 Address number into the "IP ADDRESS" field of the WDL Real-time Client.
Configure Fracpro for Testing Real-Time Streaming:
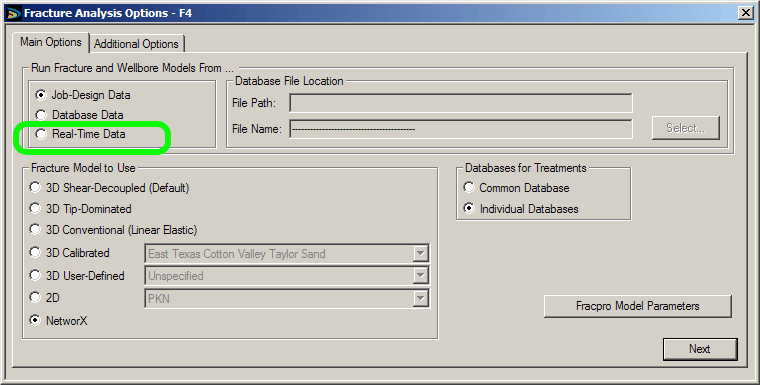
1. Open Fracture Analysis Options - F4
On the Main Options tab, select 'Real-Time Data'. Technically, you can also run using 'Database Data' if you have a previous database file (to use, be sure to select the file path and name).
2. Real-Time Control -Ctrl+F1 screen is now activated
From this screen you can start DataAcq to begin data acquisition of an emulated stage or your real-time instrumentation file.
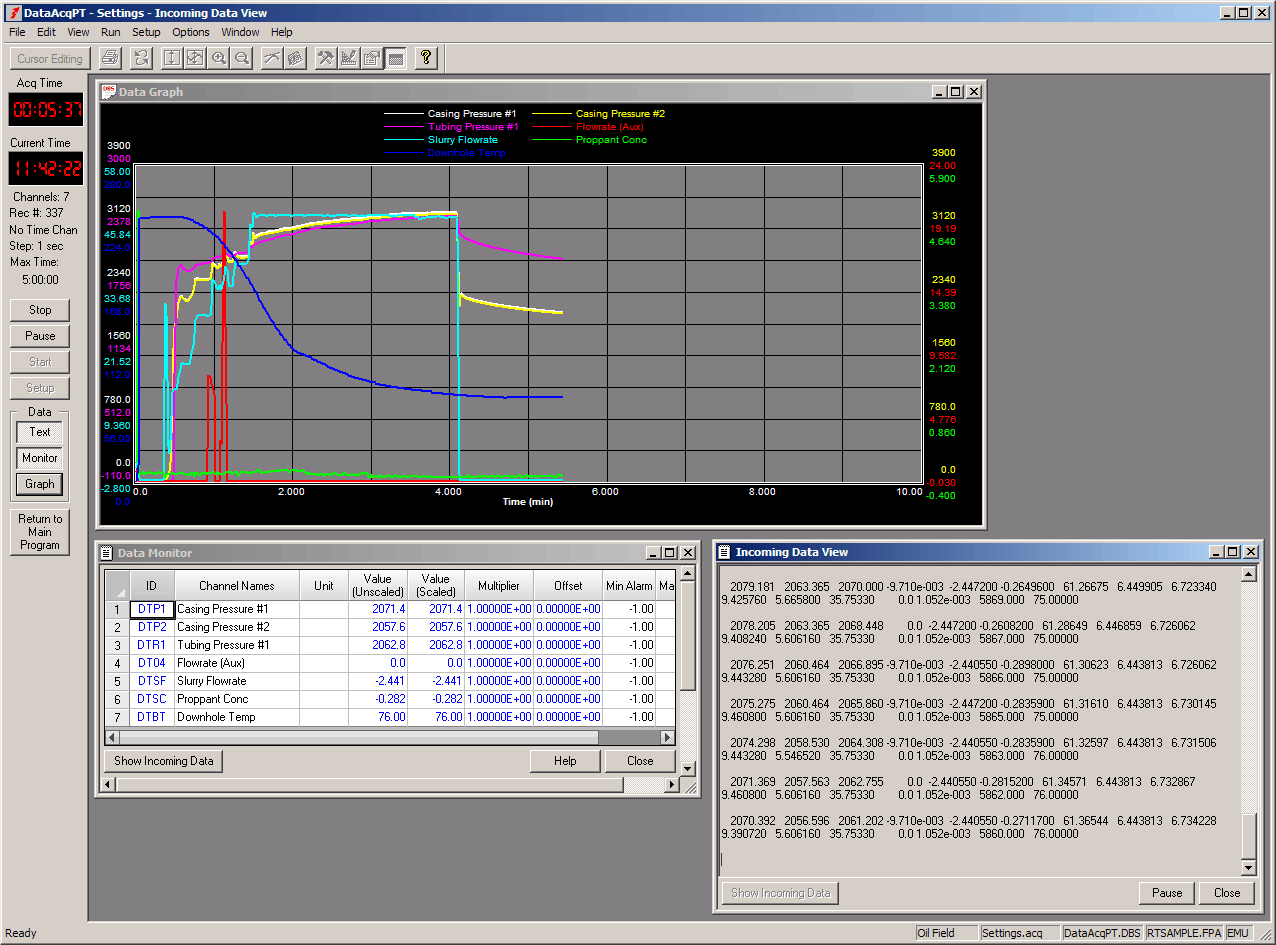
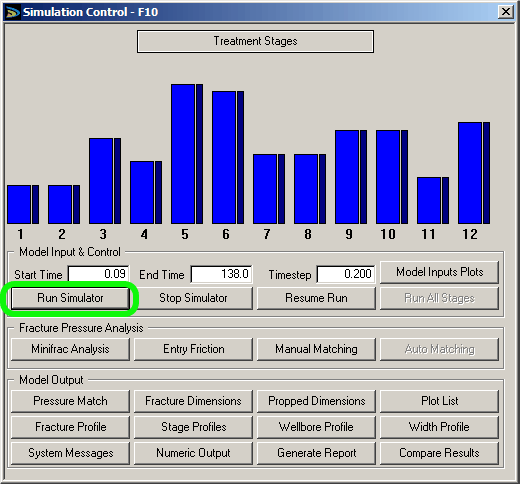
3. Open Simulation Control -F10
Click the 'Run Simulator' button. This begins the model execution for testing Real-Time streaming.
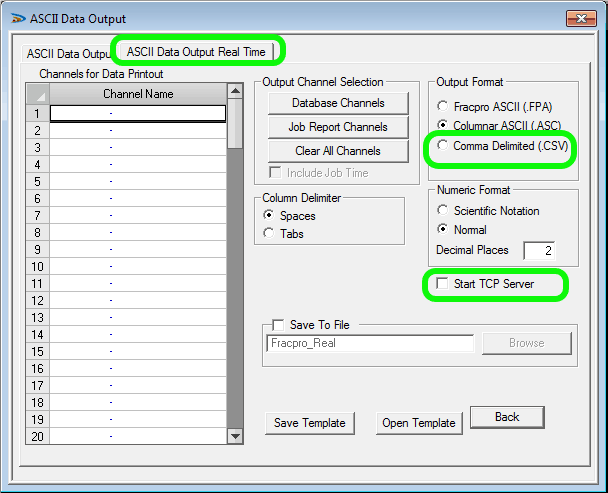
4. ASCII Data Output- F2+Select
On the 'ASCII Data Output Real Time' tab, make sure 'Comma Delimited (.CSV)' is selected and then click the 'Start TCP Server' checkbox. This will need to be rechecked each time Fracpro is restarted or a new .INP file is loaded.
5. Start Stream in the Well Data Labs Real-Time Client
Once the simulator is running and 'Start TCP Server' is selected, you can click the green 'Start' button in the Well Data Labs Real-Time Client.

A confirmation box in Fracpro may pop up the first time the client is connecting to that Fracpro installation.
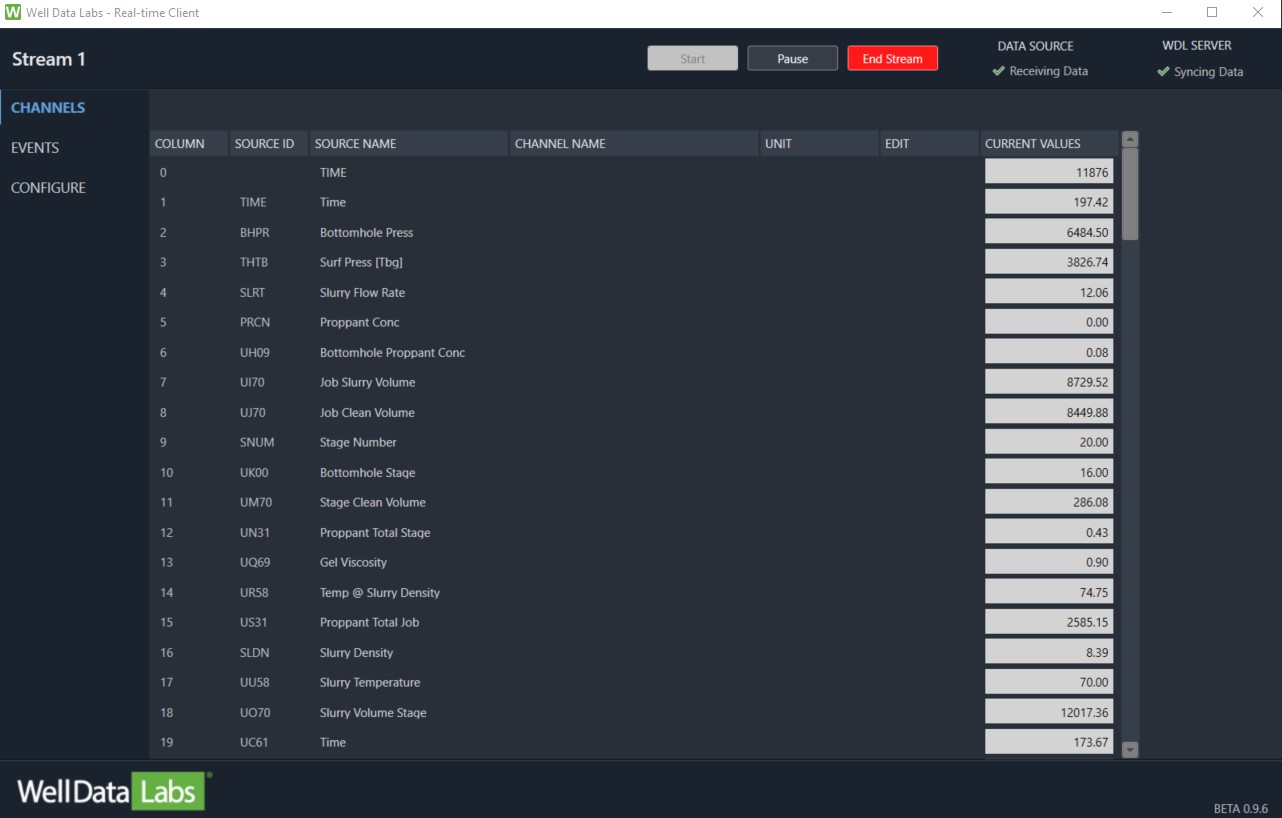
6. You should now see data streaming to the Client!