After installing the Real-time Client, there are a few easy steps you need to take for configuration.
First Time Setup & API Key
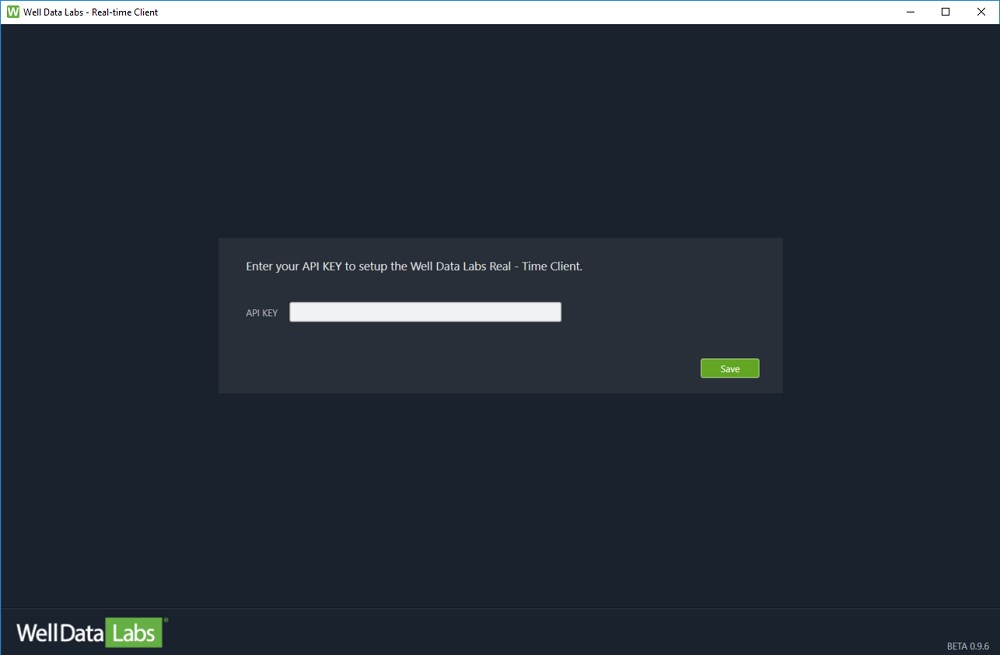
First, enter the API KEY provided by Well Data Labs Support. This will be saved on your computer and should not need to be re-entered.
Create New Stream
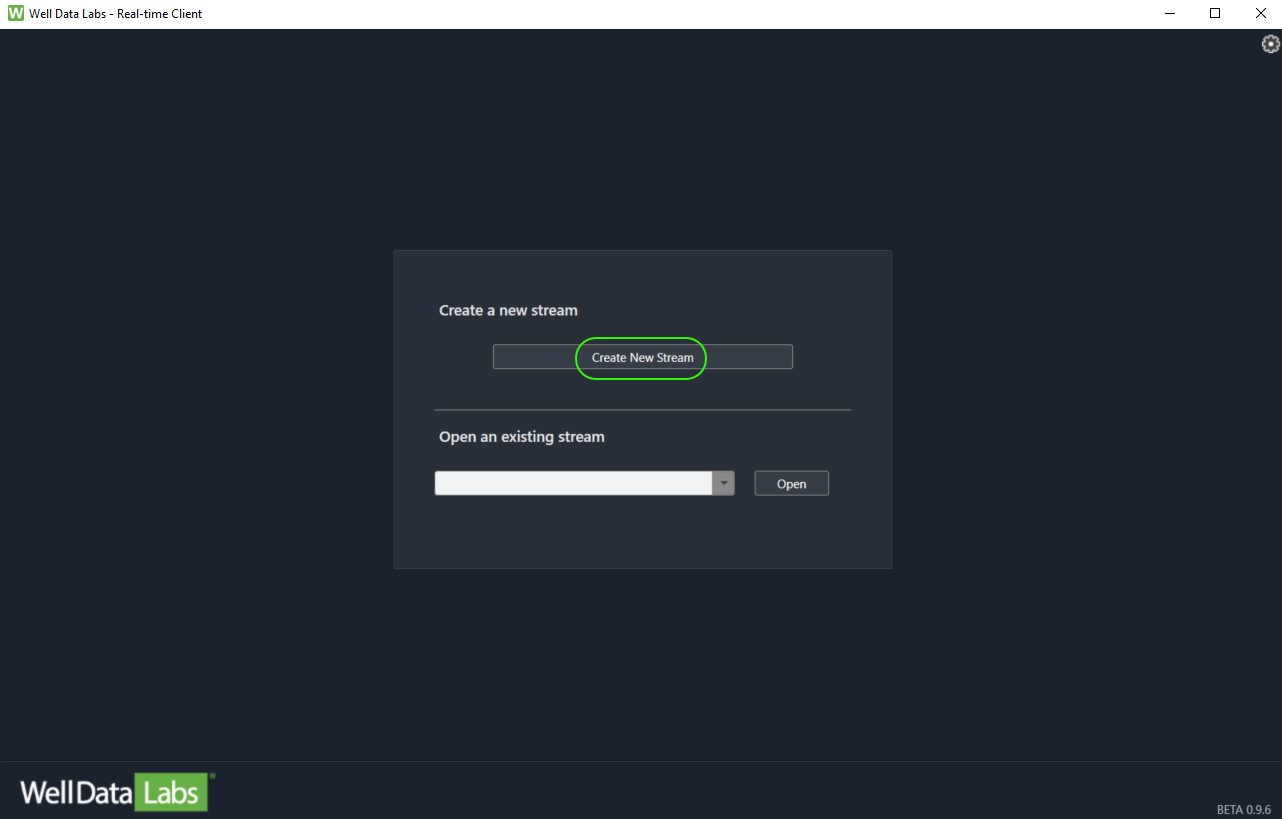
Next, click the Create New Stream button.
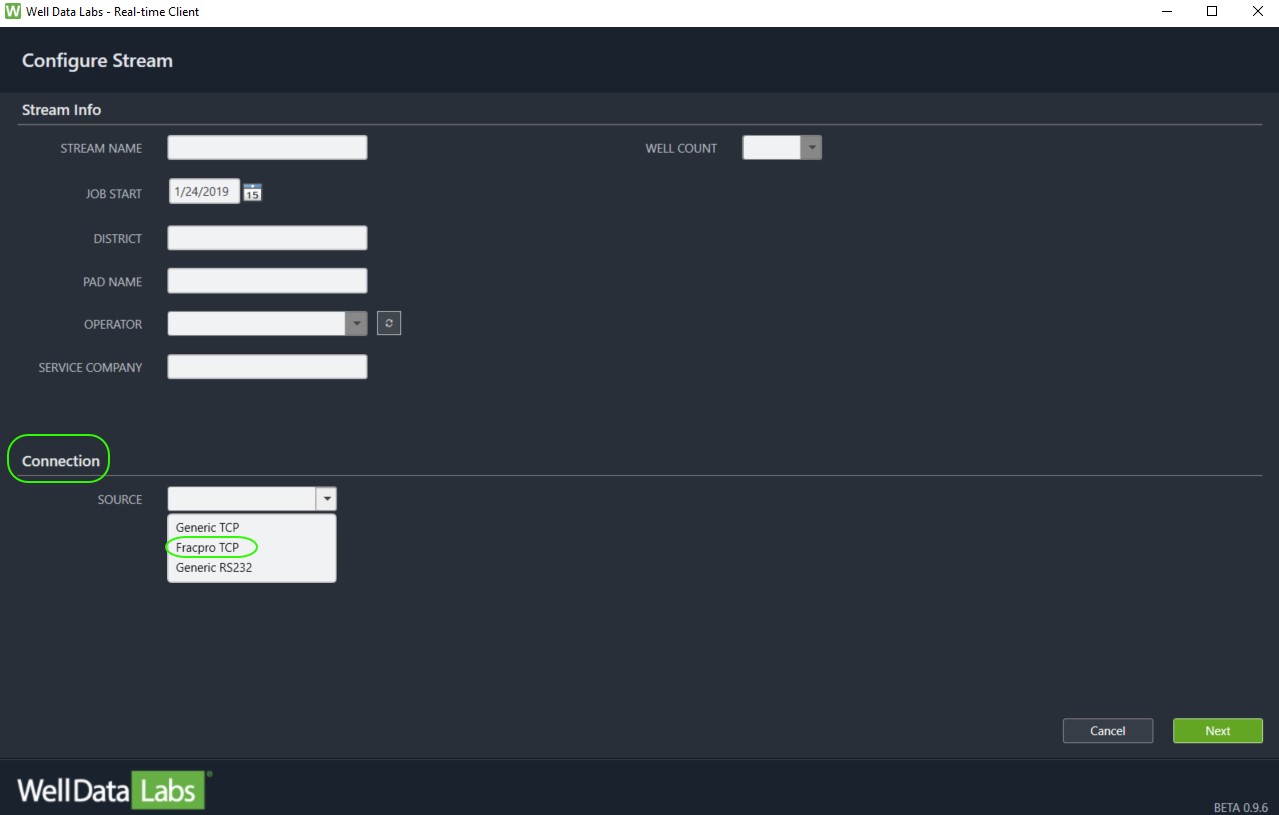
Configure Stream
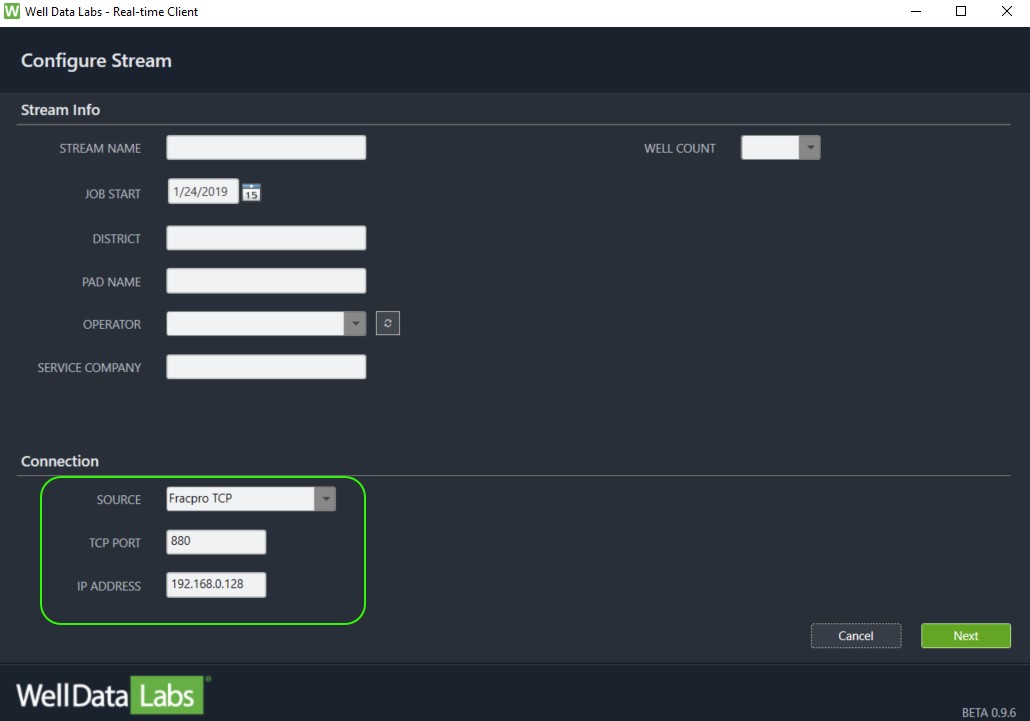
You will be on the Configure Stream page. The Stream Info is where your Stream Name, Pad Name, etc. is entered and below that you will see the Connection area.
In this example, we'll be connecting to a Fracpro computer. Select Fracpro TCP from the Source drop-down.
Fracpro will use Port 880 by default, so you just need to enter the IP Address.
Note: You must use an integer for the port number. For example, "888", "3", "18" are all valid. . "8b", "8 88", "4.32", and "127.0.0.1" are not valid port entries.
Get the IP Address
If you're running the WDL Client on the Fracpro machine, you can use 127.0.0.1 in the IP address.
If you aren't sure of the IP address for the Fracpro machine, follow these steps:
1) On the Fracpro machine, type Windows Key + R to bring up the 'Windows Run' dialog box.
2) Type 'cmd' and click OK to bring up the Windows Command terminal.
3) In the Windows Command terminal, type 'ipconfig' and hit the Enter key.
4) The number you'll need is called "IPv4 Address". Type that number into the "IP ADDRESS" field of the WDL Real-time Client.

Set-Up Fracpro for Real-Time Connection
In instances where you're connecting to Fracpro, one option needs to be turned on in Fracpro before the WDL Real-time Client can collect data.
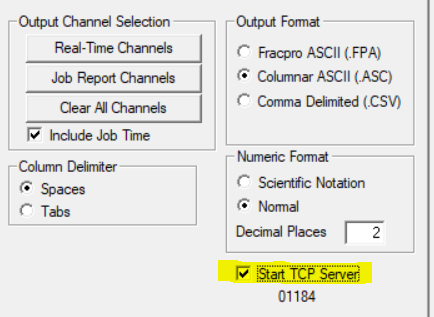
1) In Fracpro, open the 'Export ASCII Data' dialog.
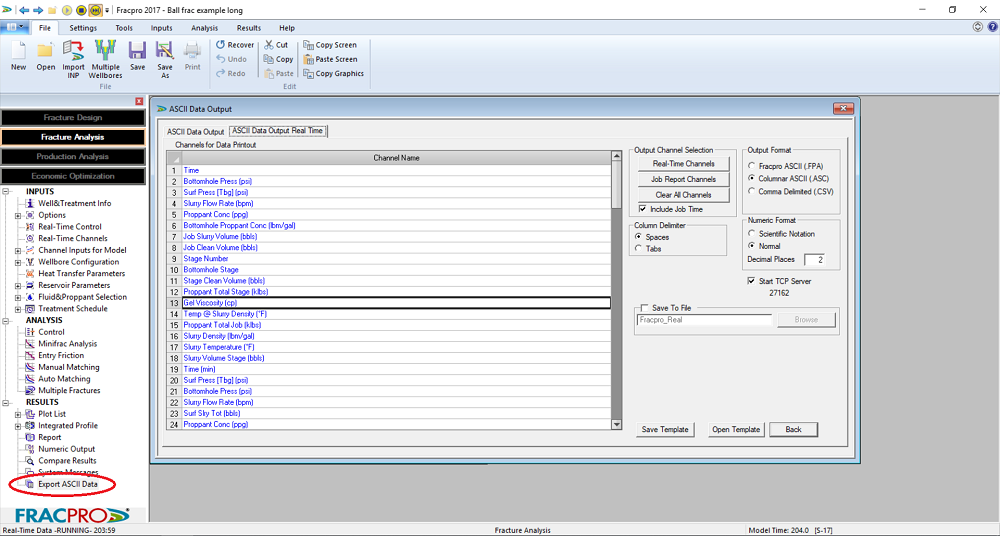
2) Click on the 'ASCII Data Output Real Time' tab.
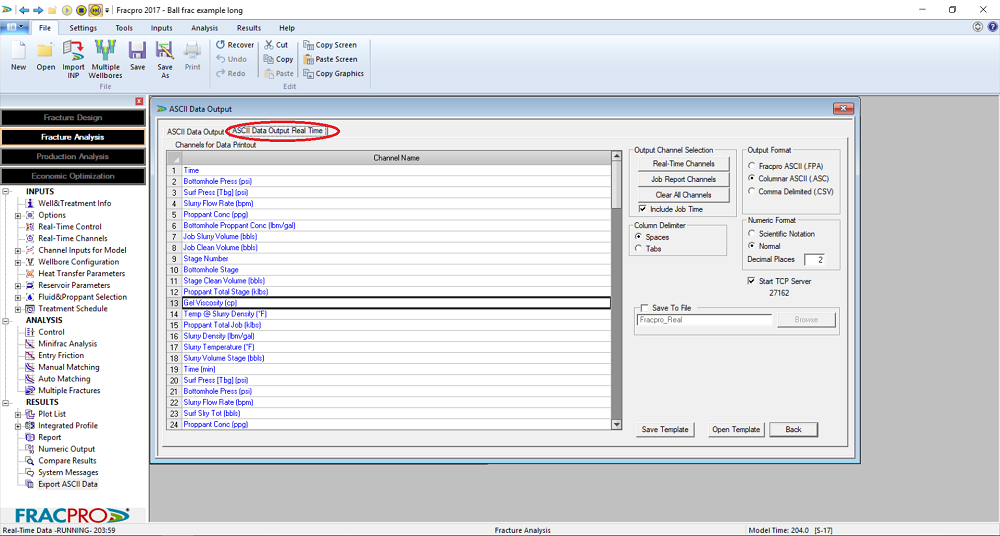
3) Click on the checkbox marked 'Start TCP Server'. This will need to be rechecked each time Fracpro is restarted or a new .INP file is loaded.