Data Mapping
Stage Mappings Power-Up
Updated 1 week ago
Well Data Labs has added the Stage Mappings Power-Up to automatically set Stage Start Time, Stage End Time, Breakdown and ISIP Flags. In the upper right-hand corner of the Stage Mappings page, you’ll see a Power-Up "robot" icon. Wherever you are in the data loading process, clicking this button and running the Stage Mappings Power-Up will set the flags for any file where the flags have not yet been set. Flags will not be edited by this “Power-Up”.

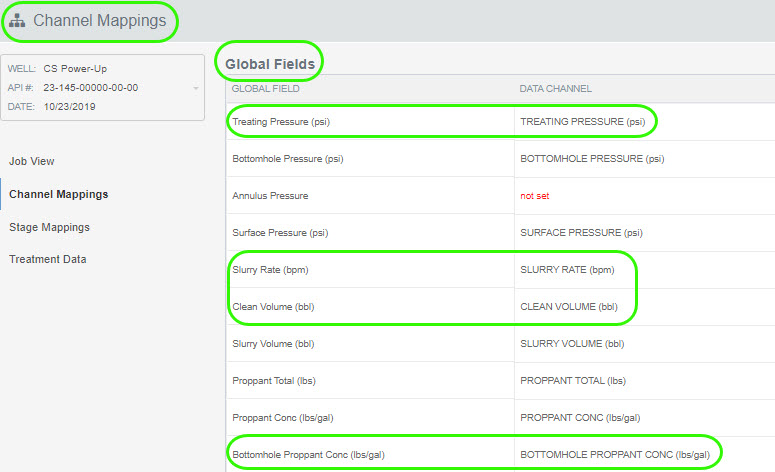
*Please Note: On the Channel Mappings page, the Global Fields for Treating Pressure, Slurry Rate, Clean Volume and Bottomhole Proppant Concentration are required for all Stage Mapping flags to be set by this Power-Up. Additionally, this Power-Up requires one file per stage.
Getting Started
In the following example, a new job has been created, 4 csv files have been uploaded and the channel mappings have been set. The next step is to set the Stage Mappings.
On the Stage Mappings page, click the “Power-Up” button. The Power-Up Controls window will be displayed.
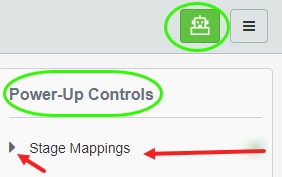
Expand the Stage Mappings and click the “Run” arrow.
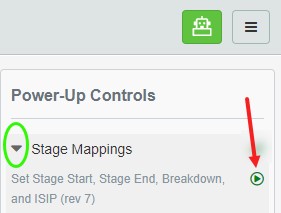
The flag predictions will begin running for the 4 files that are uploaded.
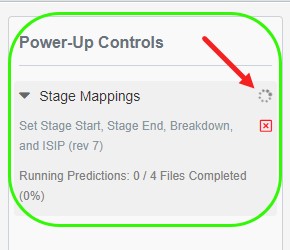
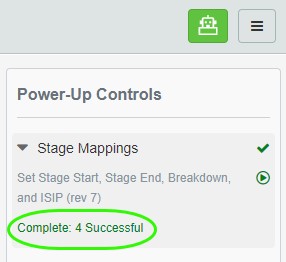
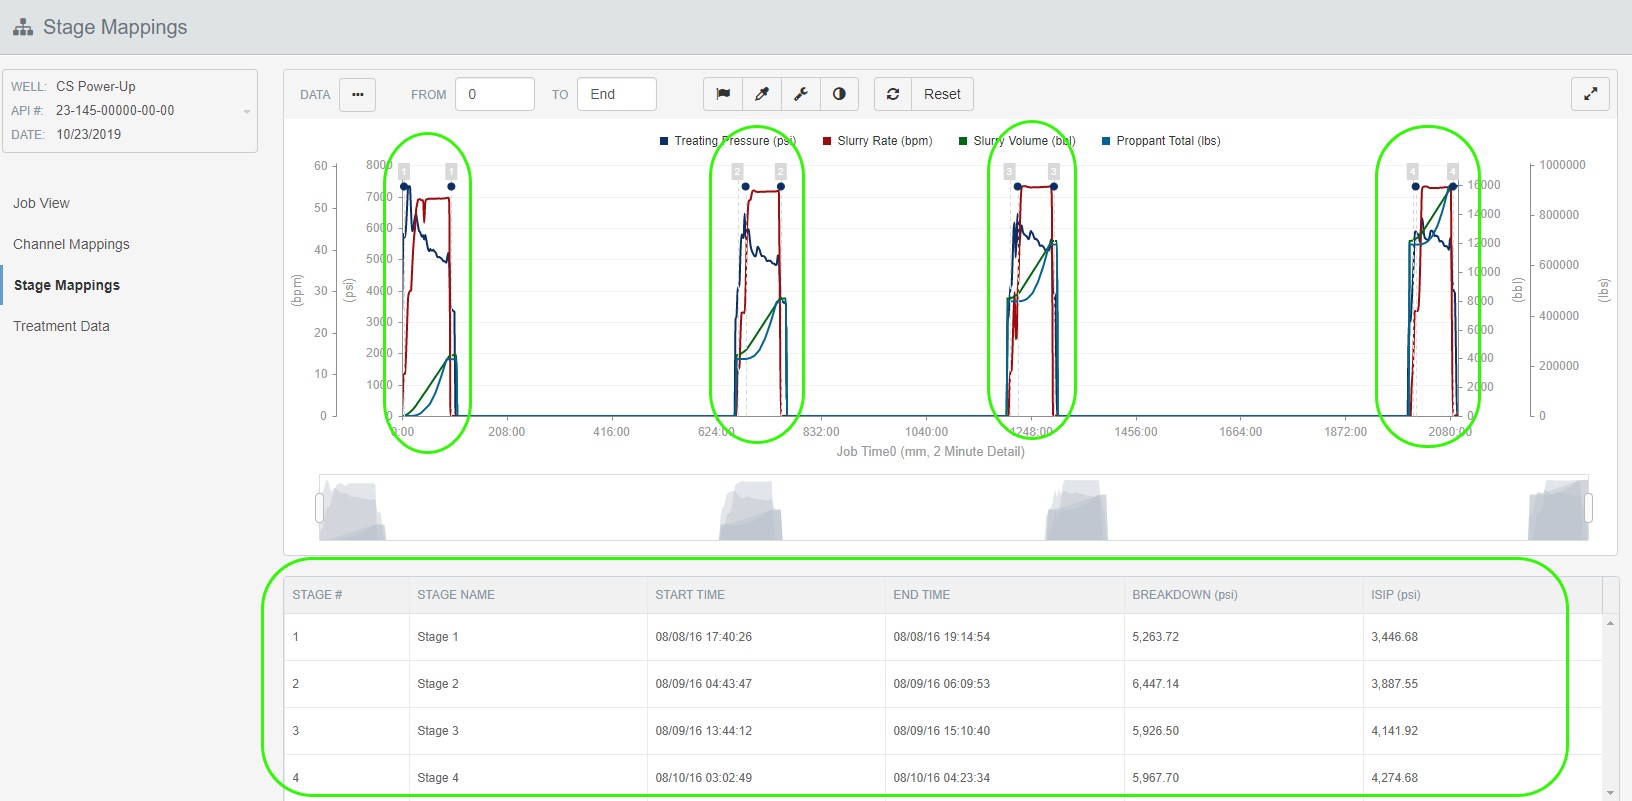
When the “Power-Up” is complete, a “Complete: xxxx Successful” message will display and the stages and flags will be mapped on the chart. The grid below the chart will be populated with the Stage Start and End times and Breakdown and ISIP pressures.
Editing the Predicted Flags
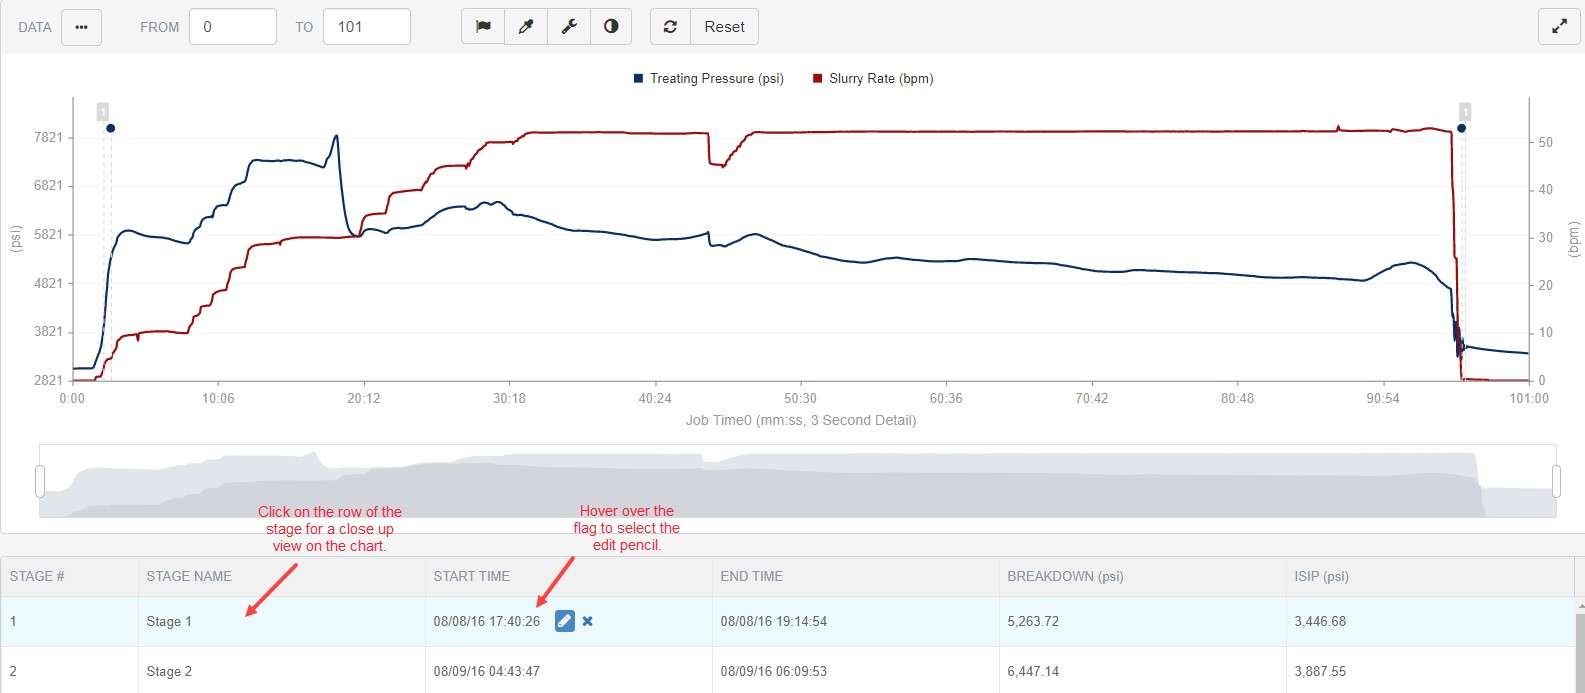
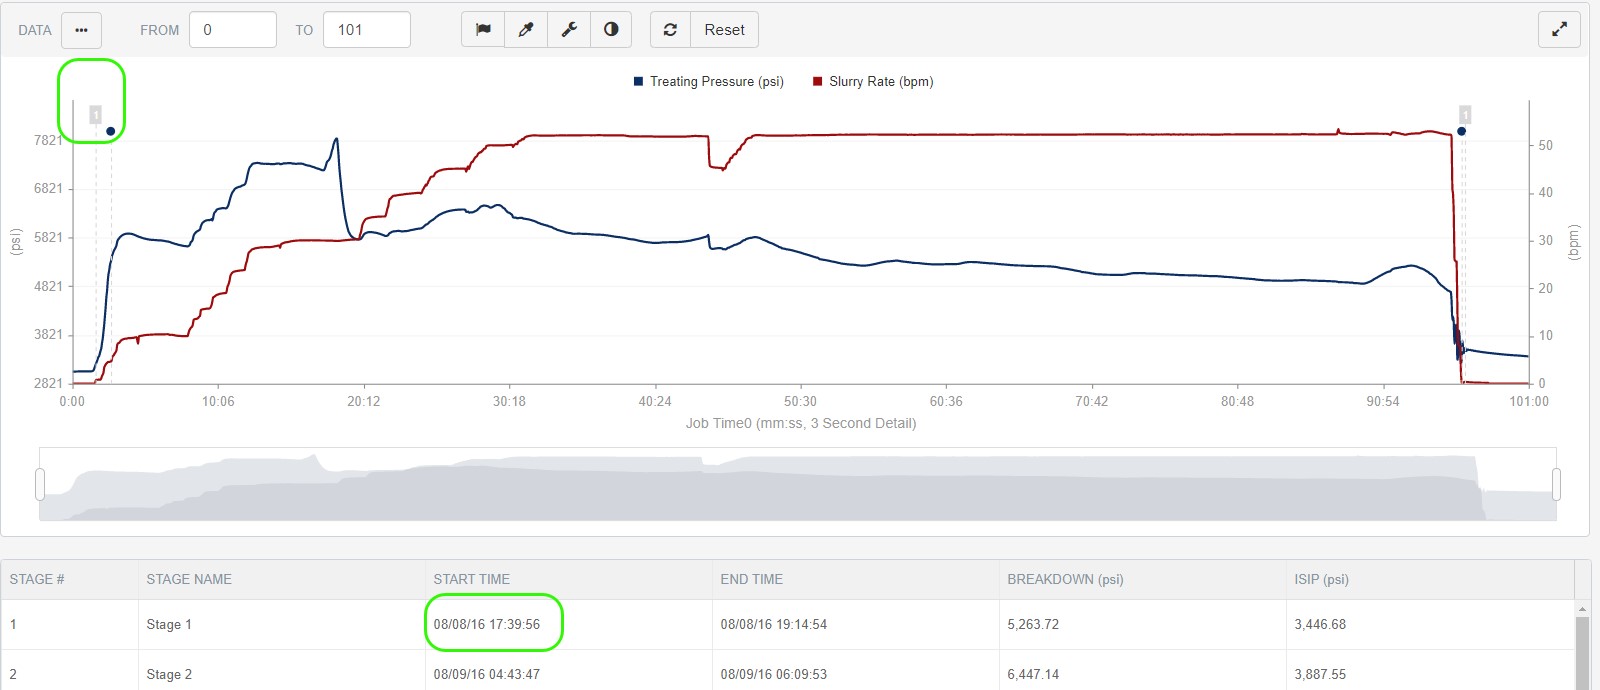
After the “Power-Up” completes, if any of the flags need to be changed, manually edit the predicted flag locations by first clicking on the row of the stage in the grid (to get a close up view of the stage) then hover over the Start Time, End Time, Breakdown or ISIP in the grid below the chart and click the edit pencil. Drag your mouse to where the flag should be set and left click. You can also manually enter the Start Time and End Time for each stage using a MM/DD/YY hh:mm:ss format.
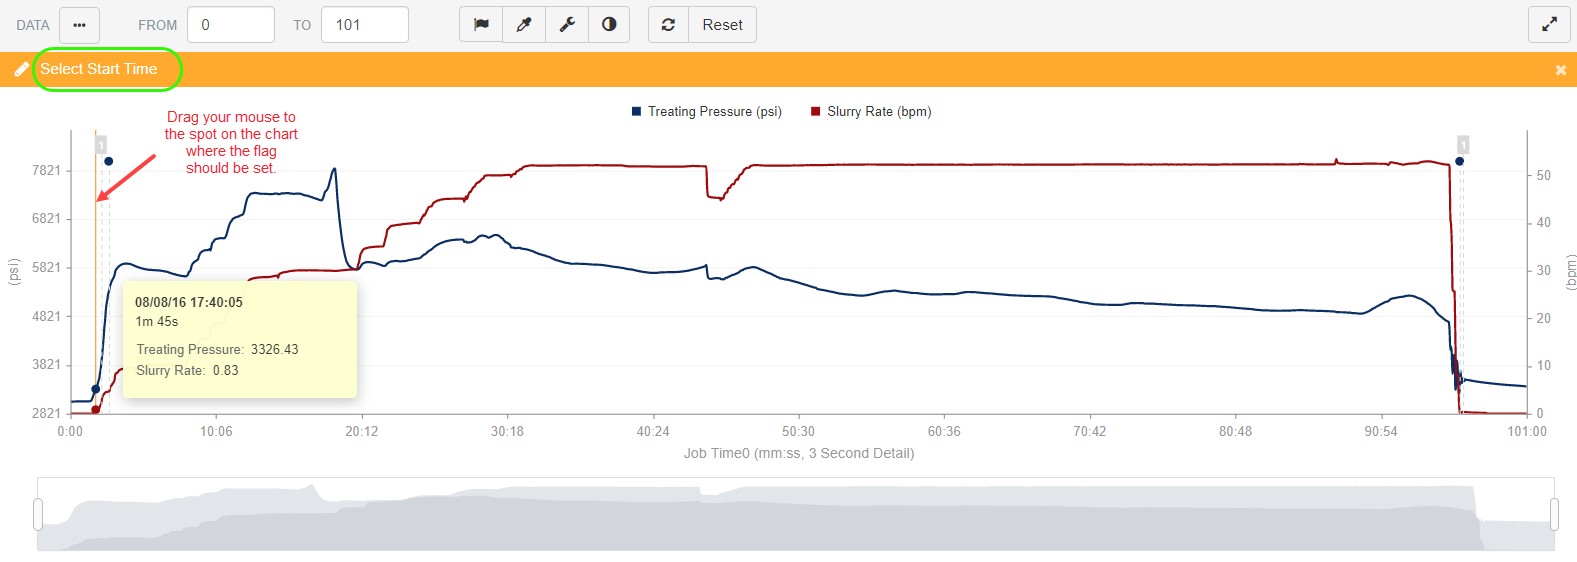
Notice the Stage Start Time flag has been updated on the chart and the Start Time on the grid has been updated as well.
Mapping Stages for Additional Files
In most cases, files are uploaded to the Job and the “Power-Up” is run to automatically set the flags for each file. If any additional files are uploaded to the job after running the initial "Power-Up", they can easily be mapped by clicking the “Power-Up” button again.
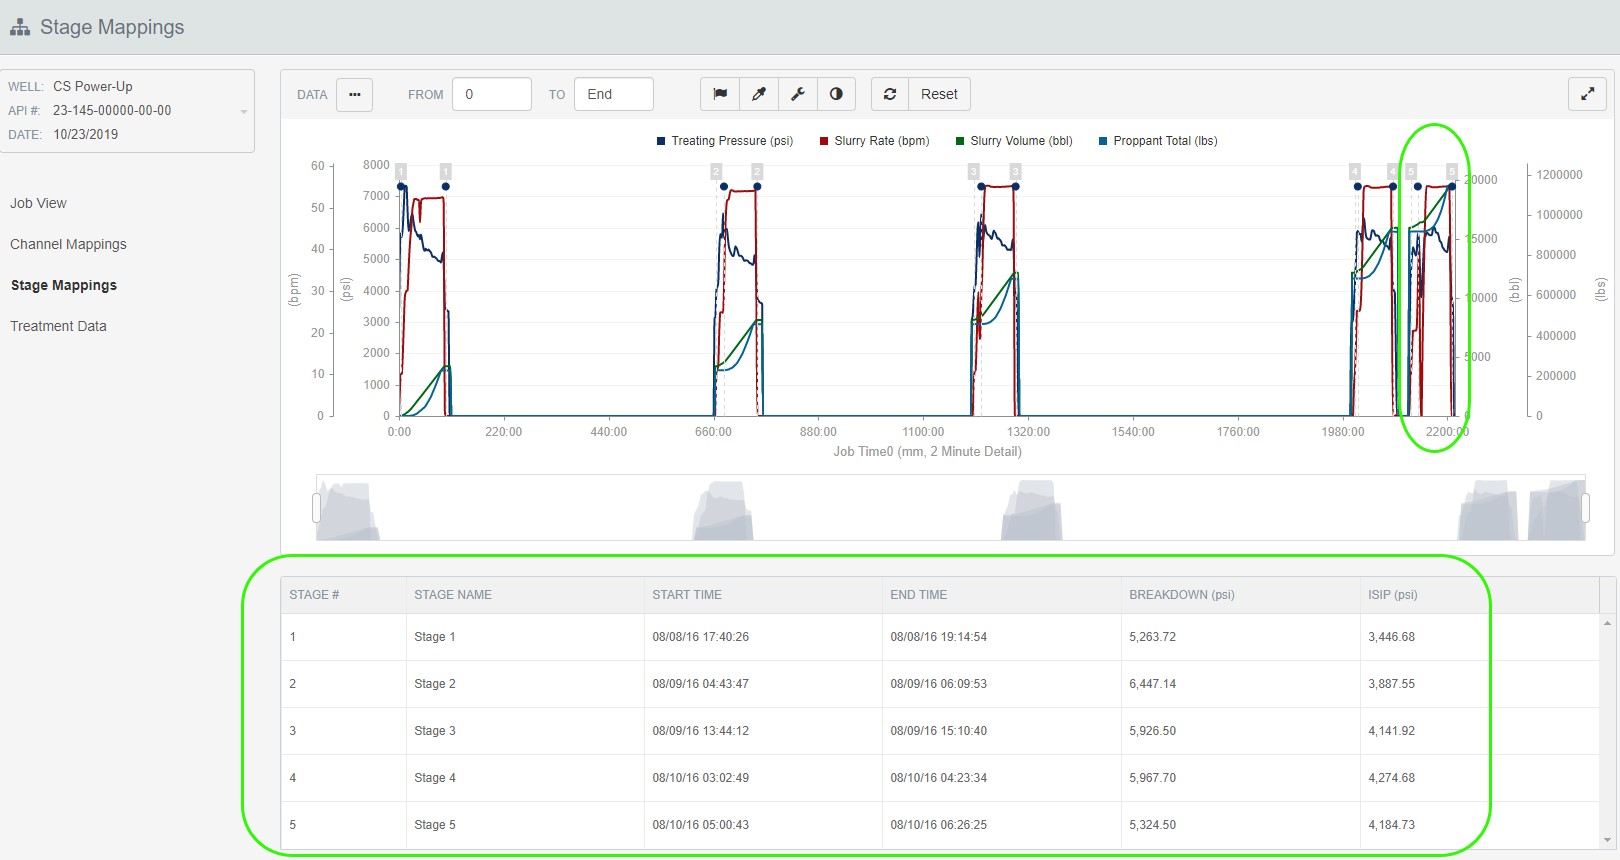
In the example below, an additional file (stage 5) was uploaded to the job.
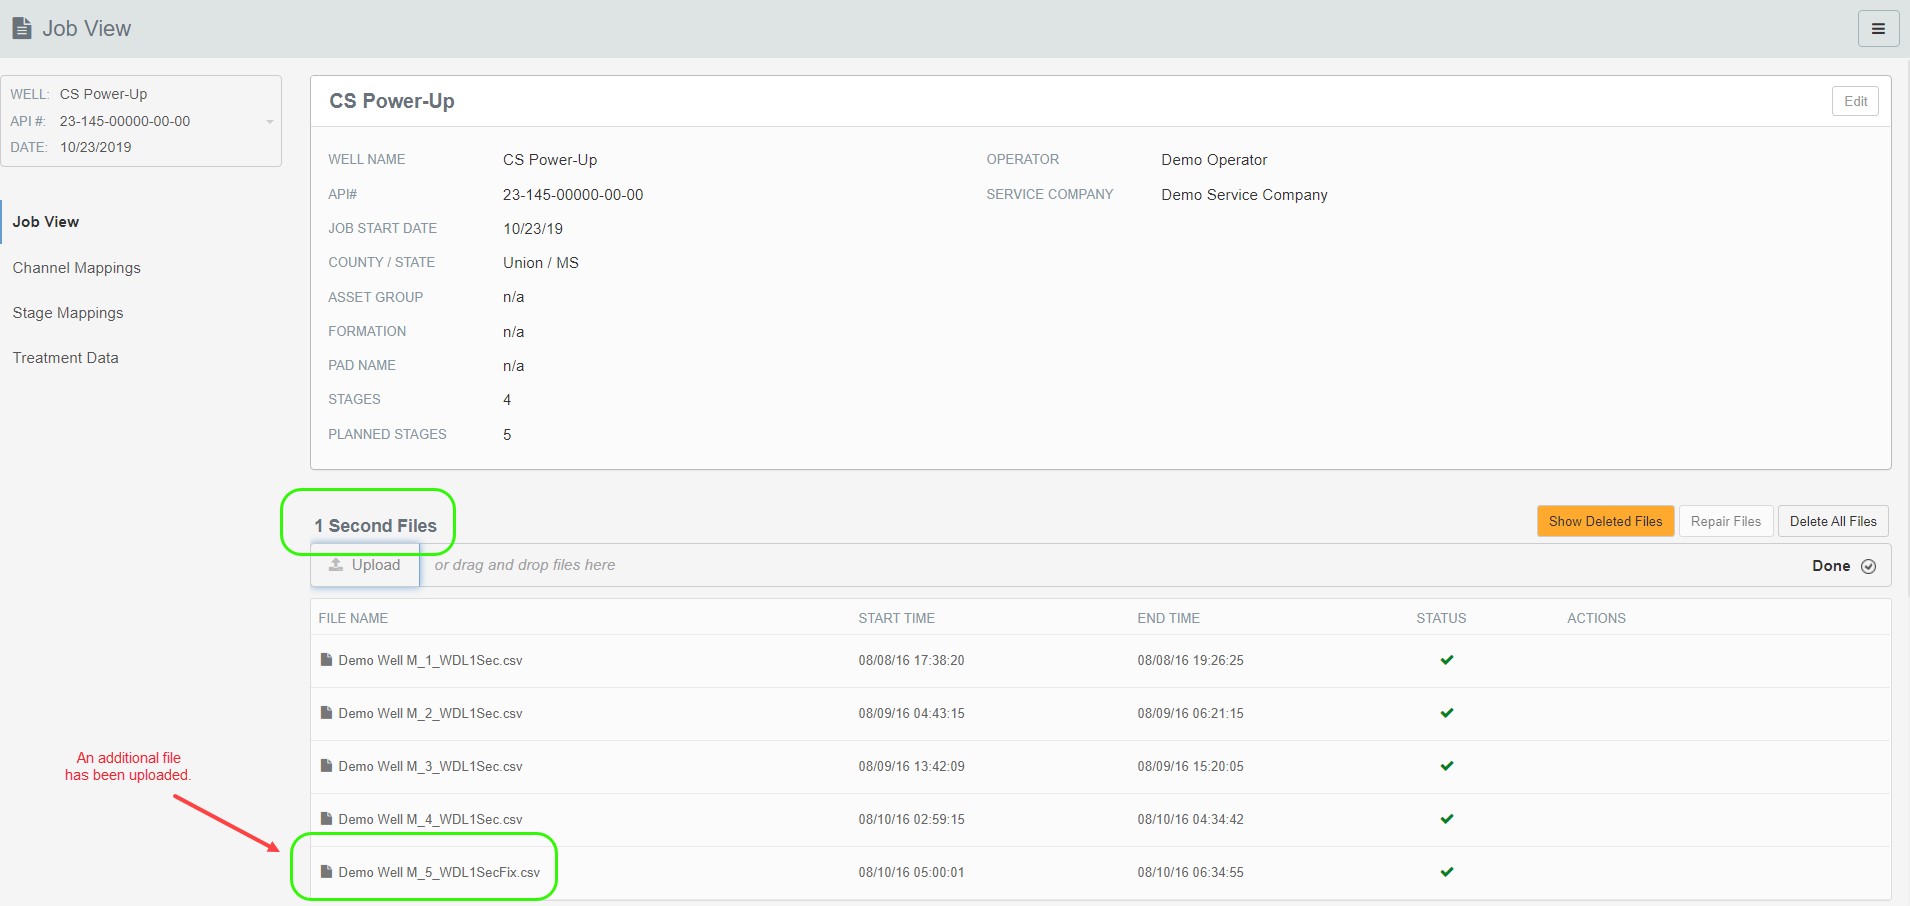
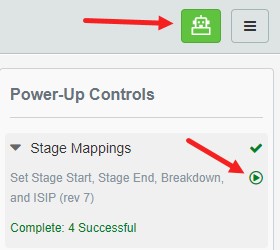
On the Stage Mappings page, click the ‘Power-Up” button then click the "run" button.
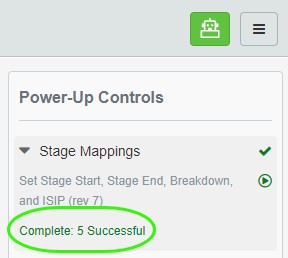
The additional stage (5) has now been flagged.
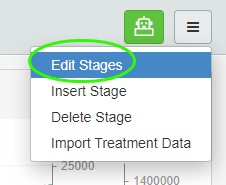
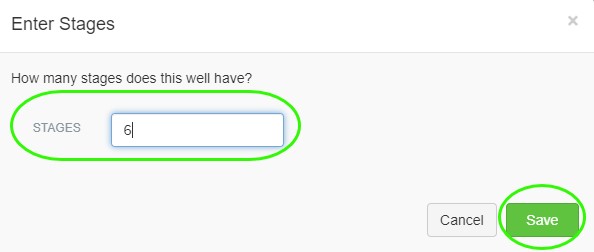
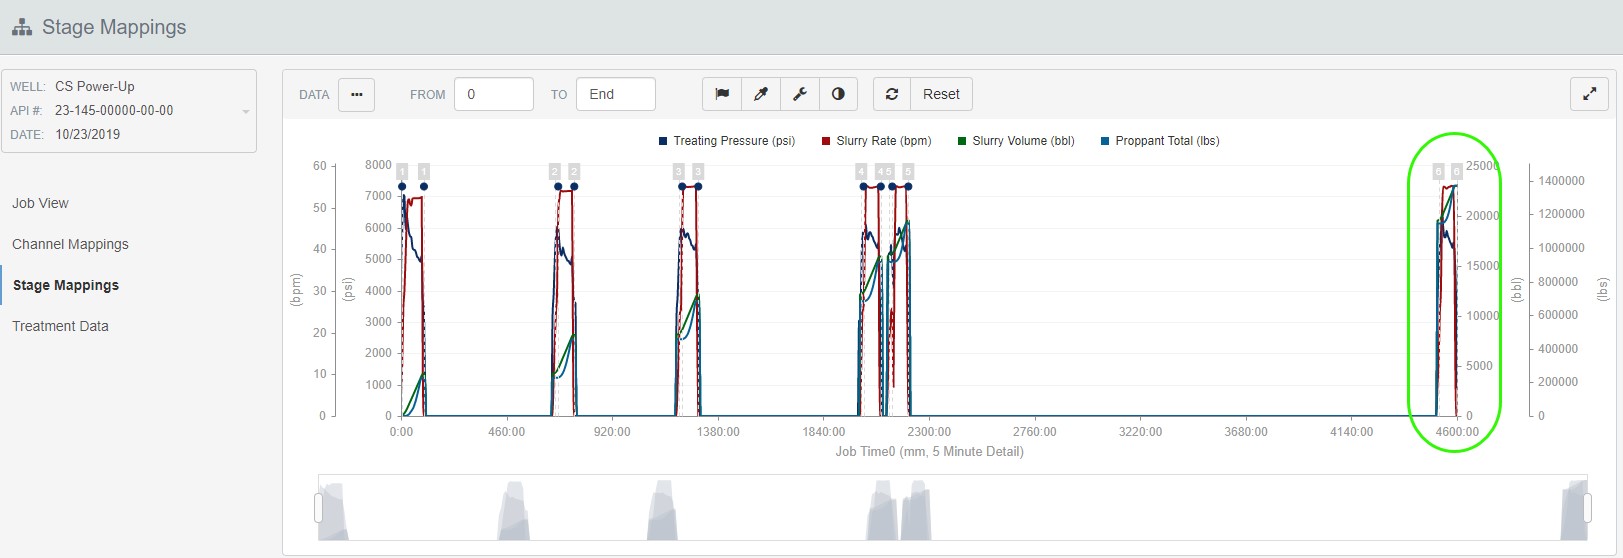
Changing the number of stages using the “Edit Stages” option under the 3-bar button found in the upper right-hand corner of the Stage Mappings page will also trigger the Stage Mappings Power-Up. The Power-Up expects to see one stage in each file, so in some cases you may need to use the Insert Stage or Delete Stage functions to add or remove lines from the grid to account for stage restarts or for files containing multiple stages.
Warnings and Error Messages
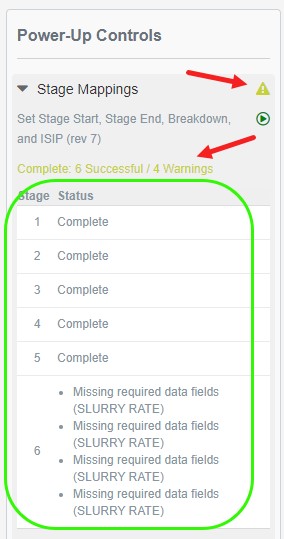
Any problems encountered by the Stage Mappings Power-Up will be displayed in the Power-Up Controls window. If you see a “Warning” triangle or an “Error” triangle, click on the warning or error message and the Status by Stage will display. If some flags are not being set, check that the status for that stage on the Job View page reads “Successfully Imported. Per sec data import completed”. Files with import errors or where the per-sec data has not completed importing, will not be mapped by the Stage Mappings Power-Up. If the Power-Up is unable to map a stage, you can always manually insert the stage and map the Start, End, Breakdown and ISIP flags.
If you have any questions or need help, you can always get in touch with us by emailing support@welldatalabs.com. We’d be happy to help!

