
Your data belongs to you. Well Data Labs provides easy ways for you to retrieve your data for further analysis. The Job View page, the Job Summary Export, and the Export drop-down on the toolbar all have options for exporting your data - so let's go over how that works!
Job View - Download All Files
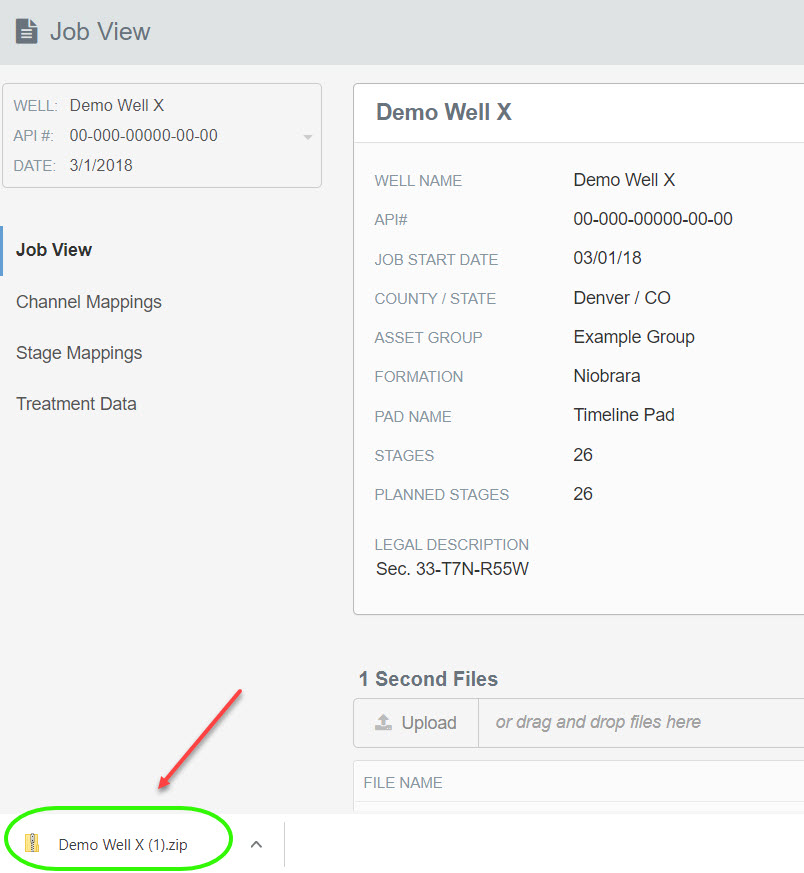
The Job View page is your data portal to get files from the service company or to pass information onto other stakeholders in your organization. Raw, 1 second files live on this page, along with any WITSML, reports, maps, or pictures that have been uploaded for a particular job. The Download All Files function will create a zip file that automatically begins downloading to your computer. Find this export feature under the 3-bar button near the upper right-hand corner of the Well Data Labs application.
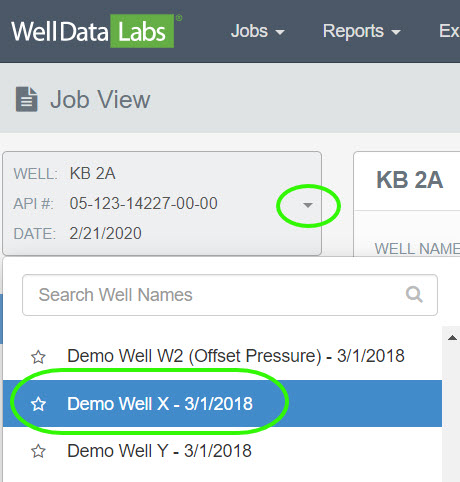
To begin, if the Job View page is not displaying your well, click on the down arrow in the job selector and select the well you need.
Click on the 3-bar button in the upper right-hand corner of the page and select Download All Files.

Depending on the size of the files uploaded to your job, this process may take a few minutes. Click on the downloaded .zip file and easily extract all files.
Export Treatment Data
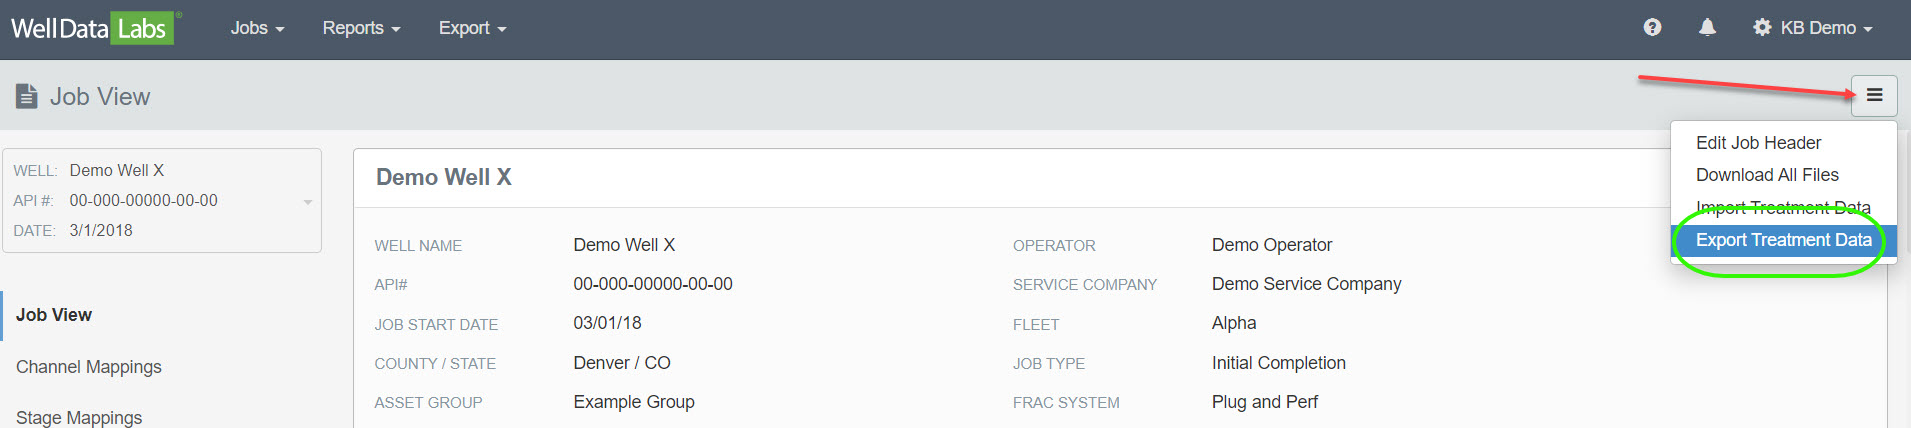
Another option you may have noticed from the 3-bar button is Export Treatment Data. This option will create an excel file with all of your treatment data by stage. Select Export Treatment Data from the 3-bar button.
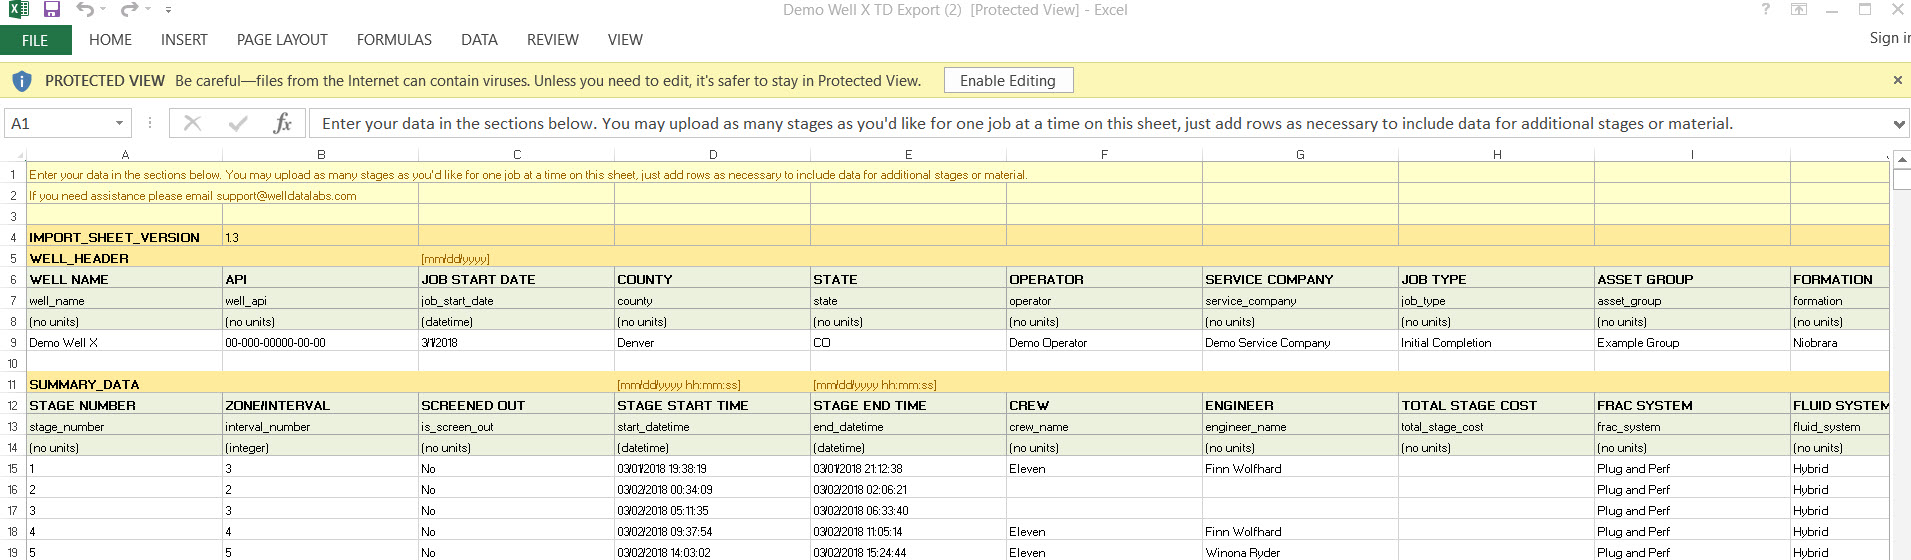
Click on the downloaded file to open.

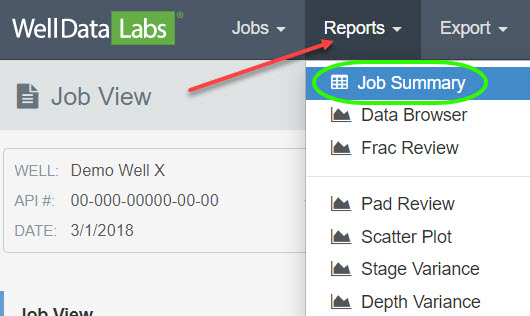
Job Summary Export
Well Data Lab's Job Summary page creates an exhaustive report of the data collected from your job. Select Job Summary from the Reports drop-down on the toolbar.
When the Job Summary page displays, click on the 3-bar button in the upper right-hand corner of the page and you'll find the export features. Selecting one of these export options will download a file that you can quickly use for immediate reporting or for further analysis and tracking.
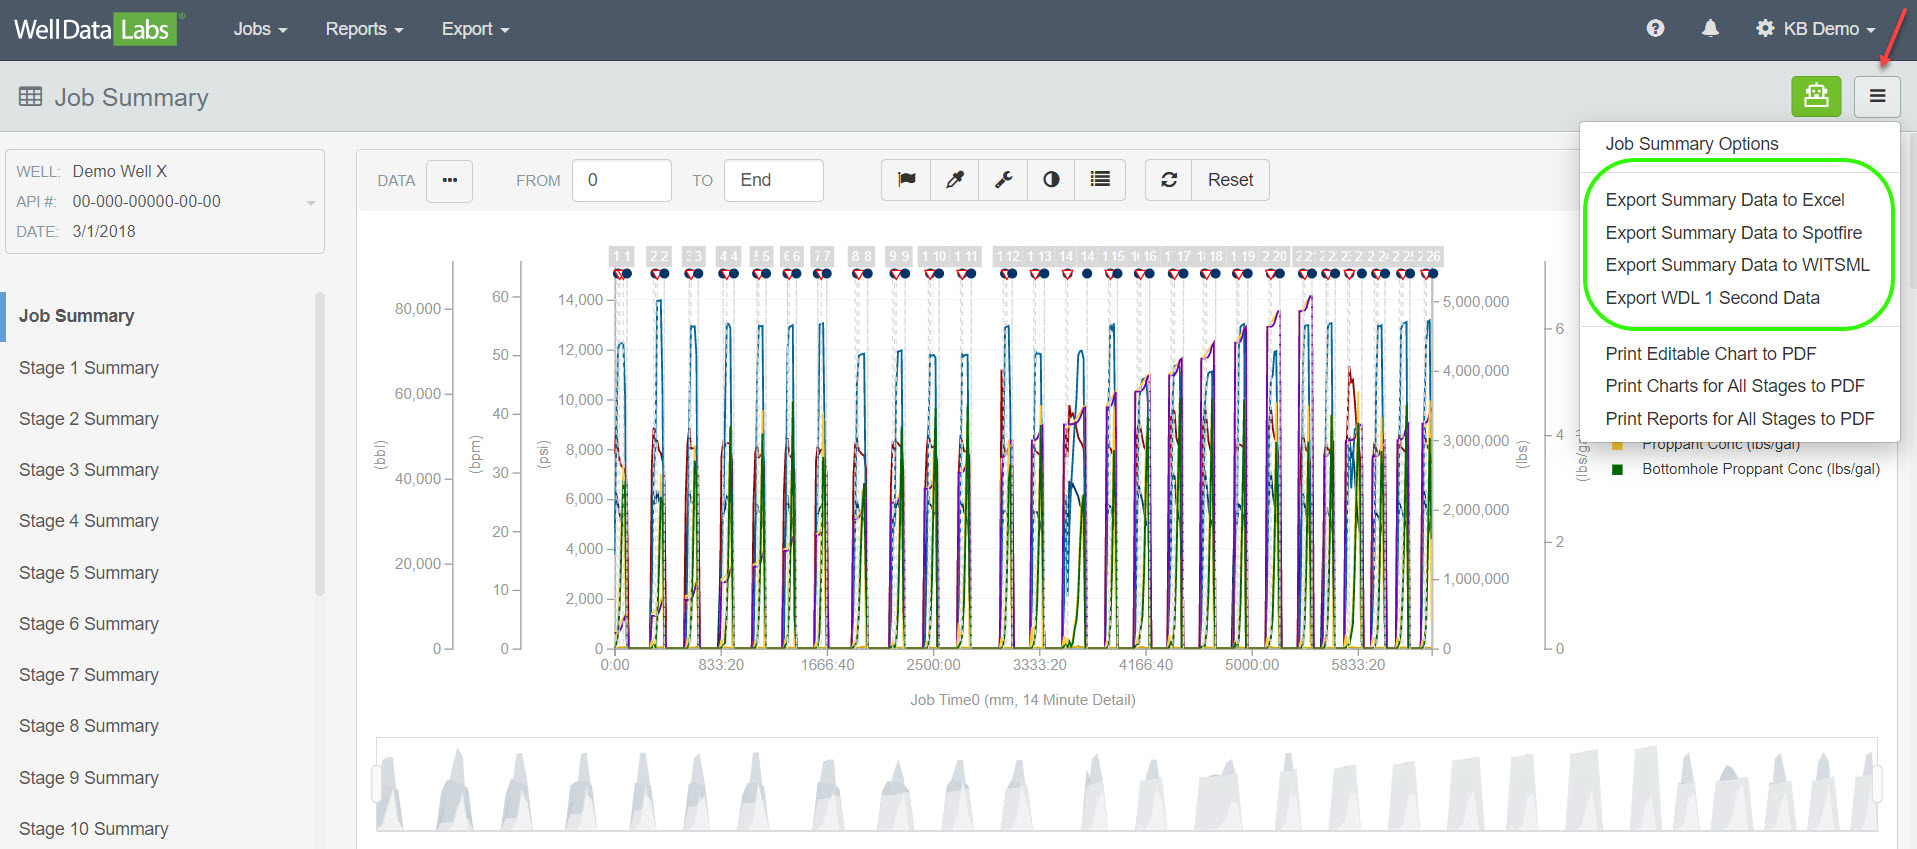
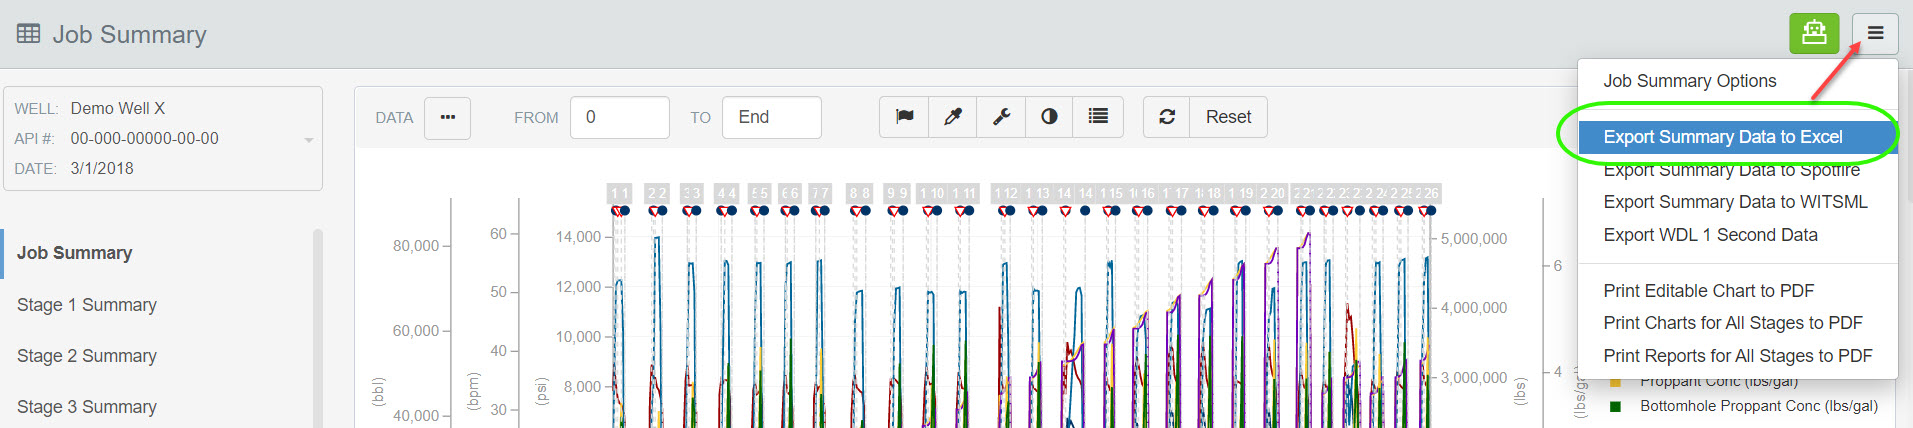
Export Summary Data
In this example, we will export the summary data to an excel file. Select "Export Summary Data to Excel".
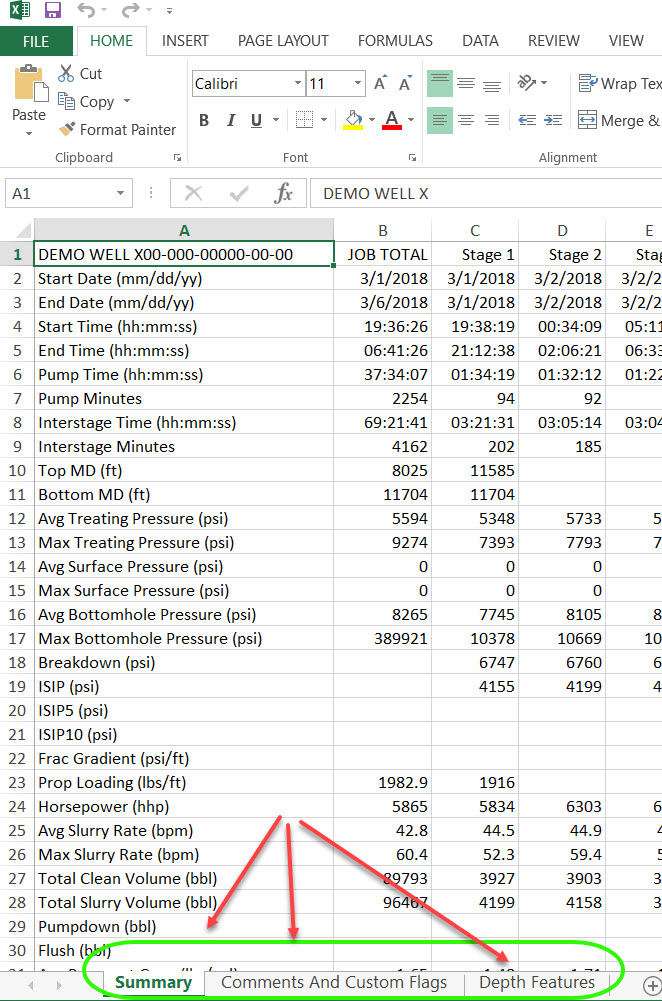
Click on the newly created Excel file to see the data.
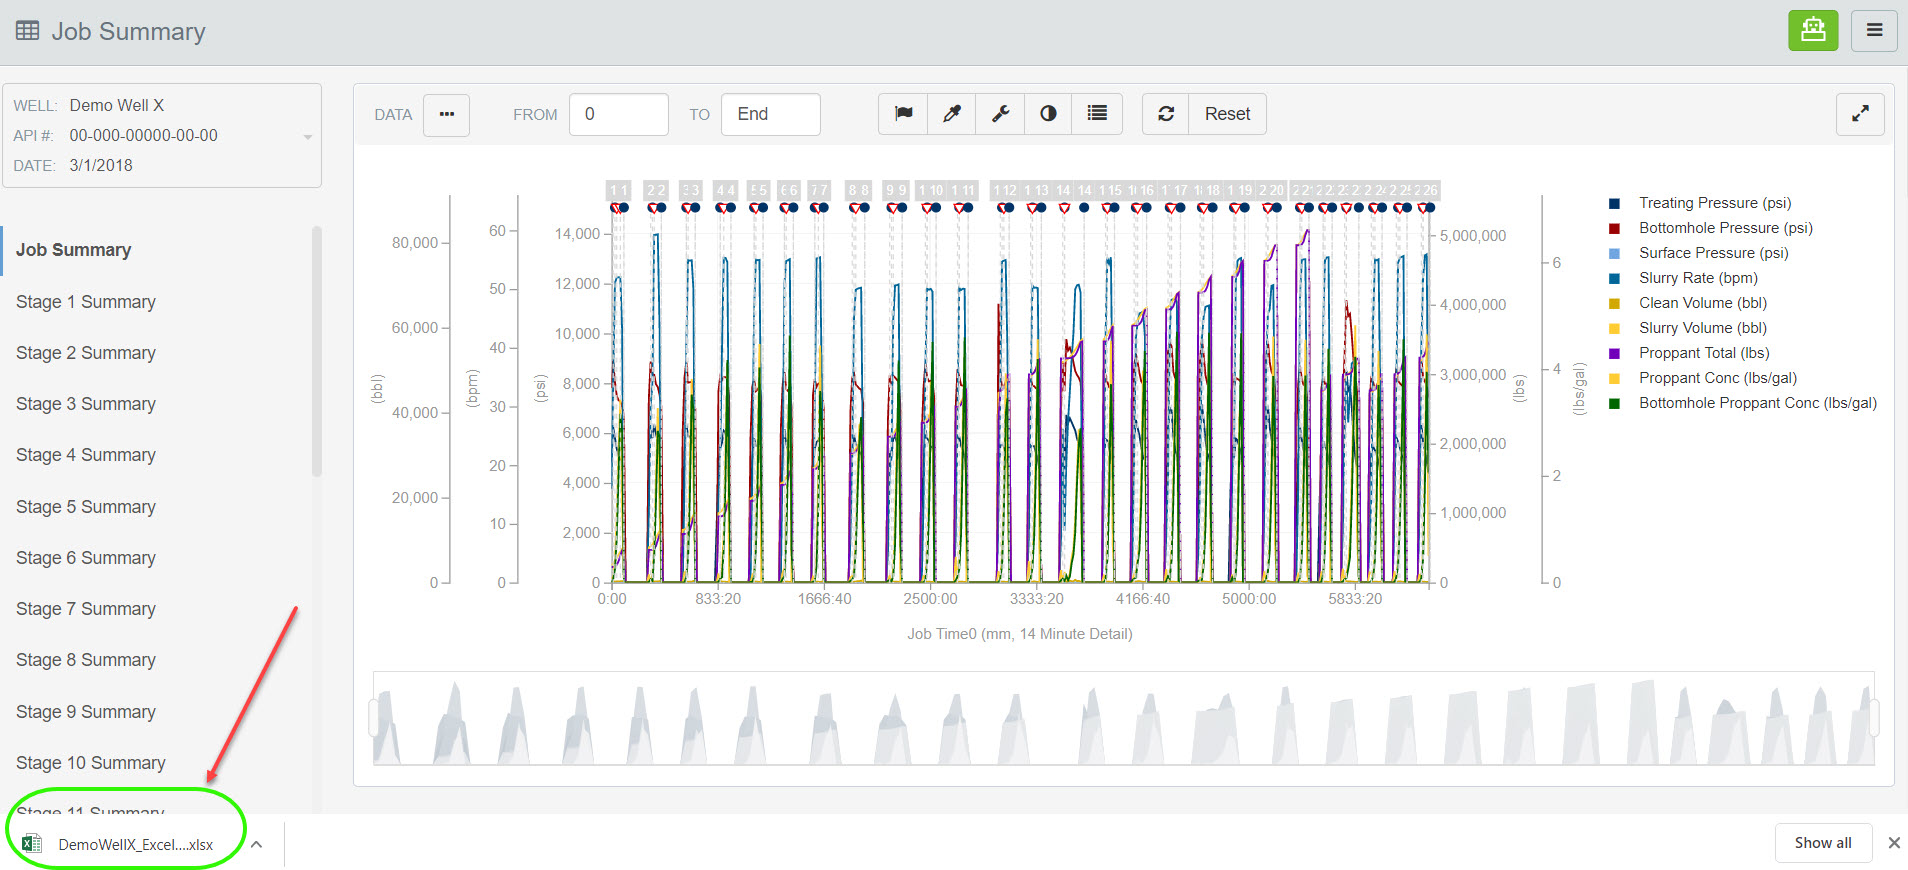
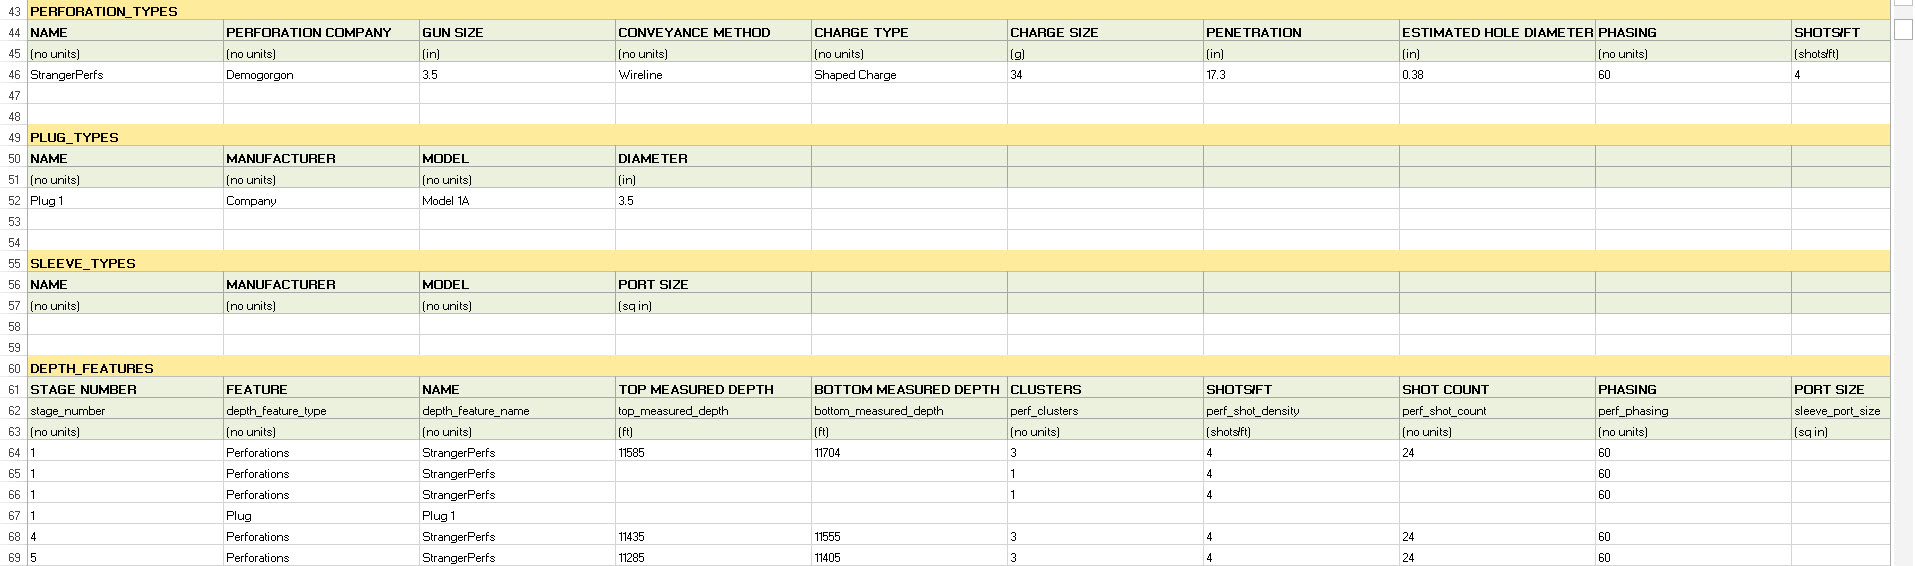
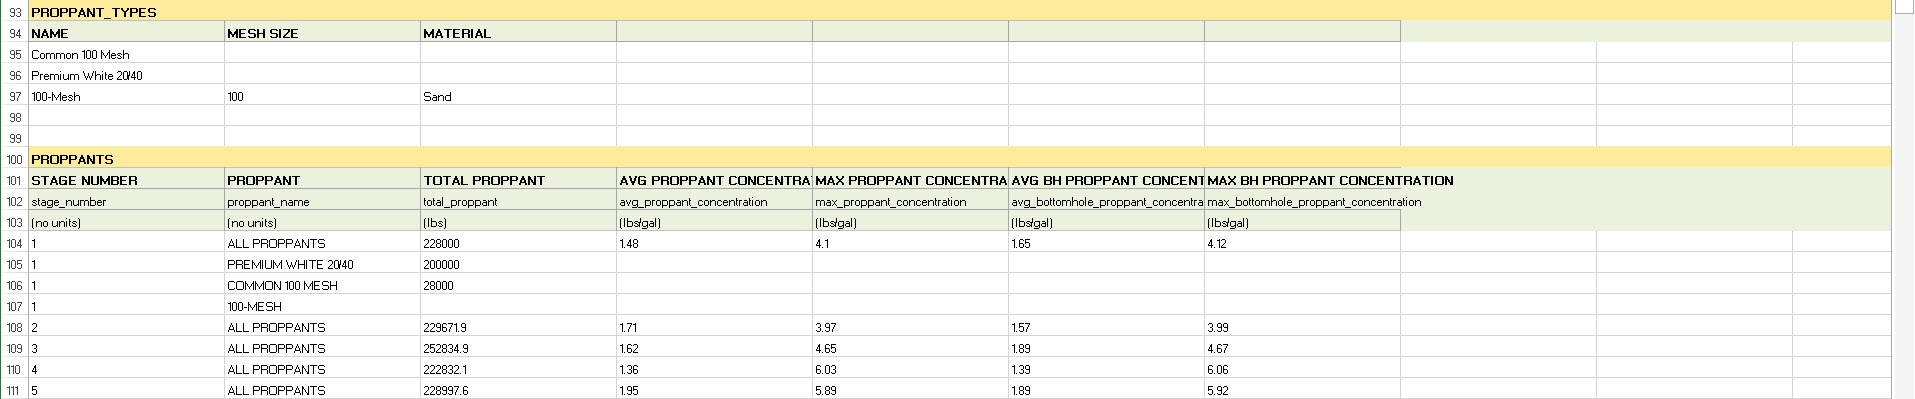
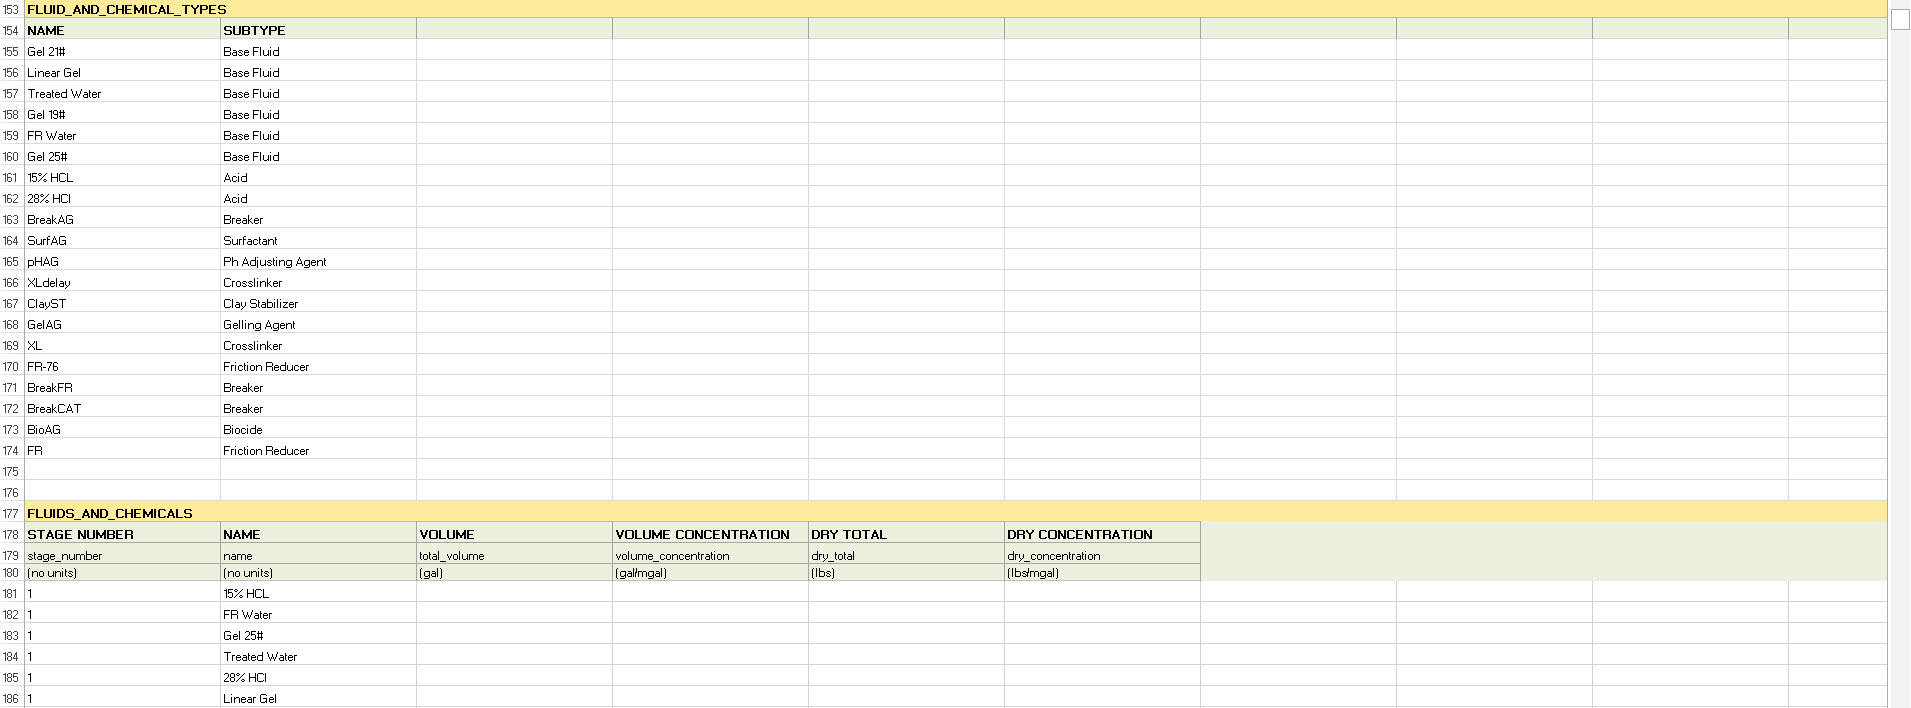
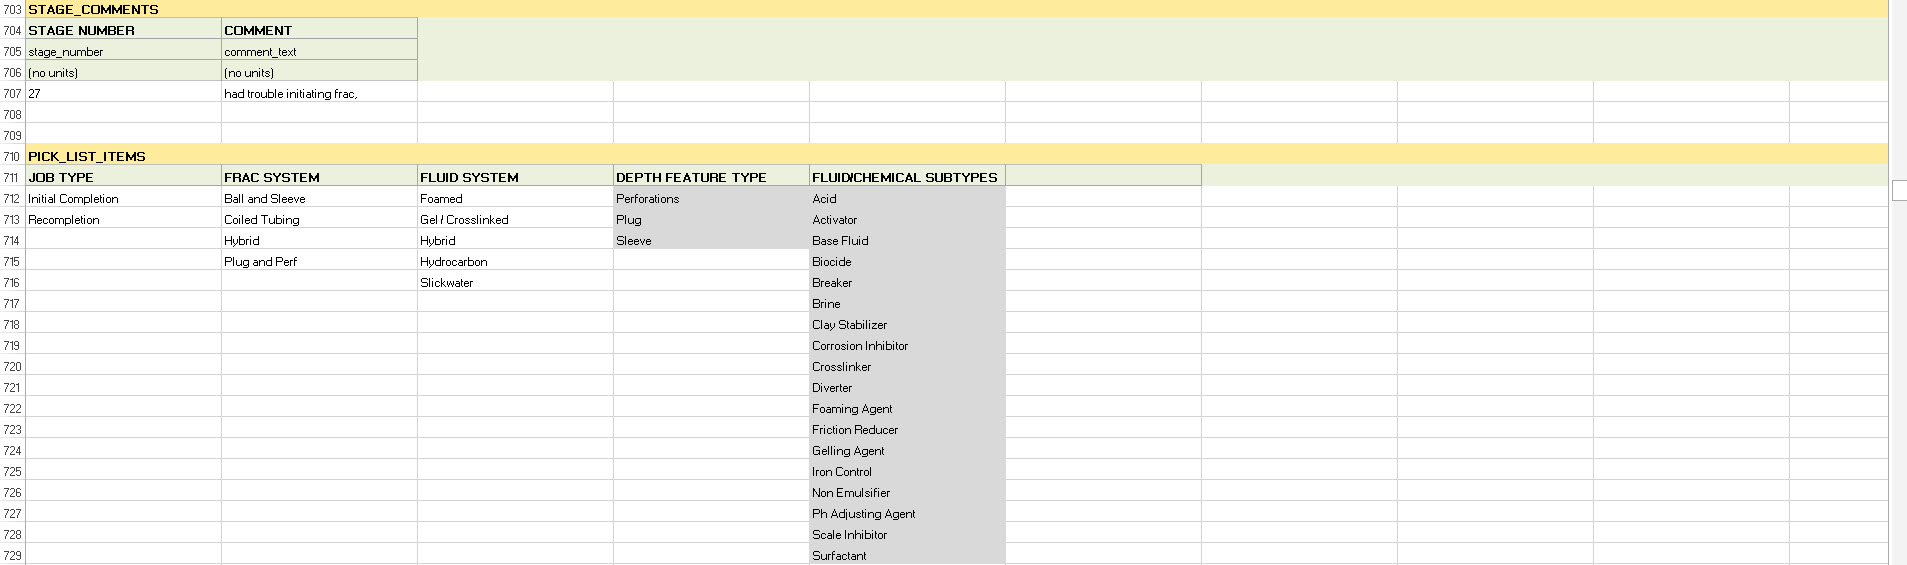
Notice the different tabs within the file including Summary, Comments and Custom Flags and Depth Features.
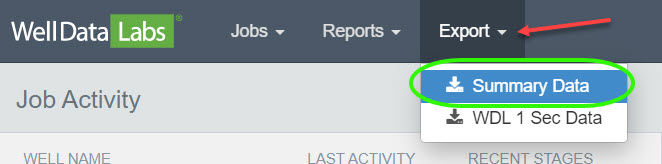
Exporting Summary Data from the Export Drop-down
Job Summary is the place to get your detailed report for a single job, but if want to get that information for many jobs at once, we built Export Summary Data. You can quickly create multi-job reports and export in formats compatible with other analytical systems.
The filters section lets you quickly narrow down the list of wells to just the ones you want to choose from. In this example, we are filtering on just the Jobs with Demo Operator, Initial Completion for the Job type and Example Group for the Asset Group. The Jobs that meet this criteria are listed under Selected Jobs. Click on the Jobs you would like and click Update.
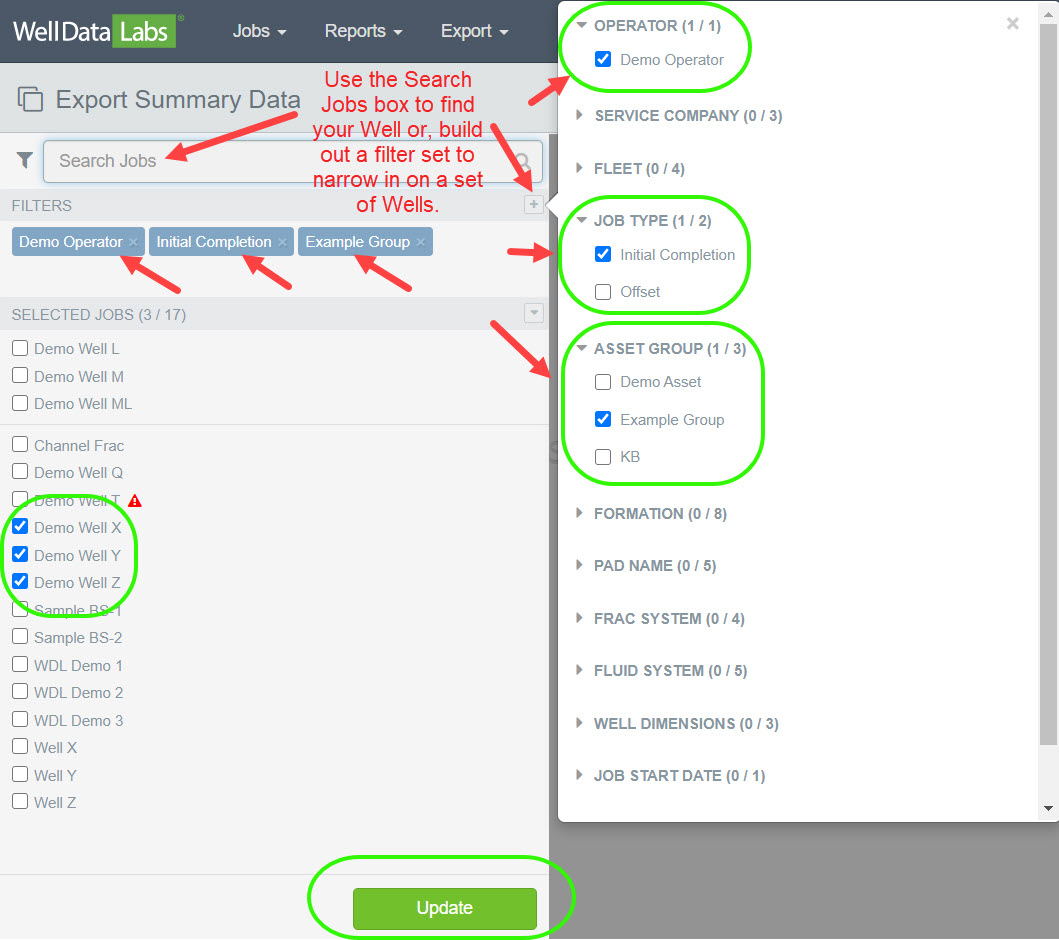
An Export Summary Data window will display where you can select the columns you would like to see in your report. The 3-dot button named Columns provides customization so you can turn off the columns that you don't need included in your report.

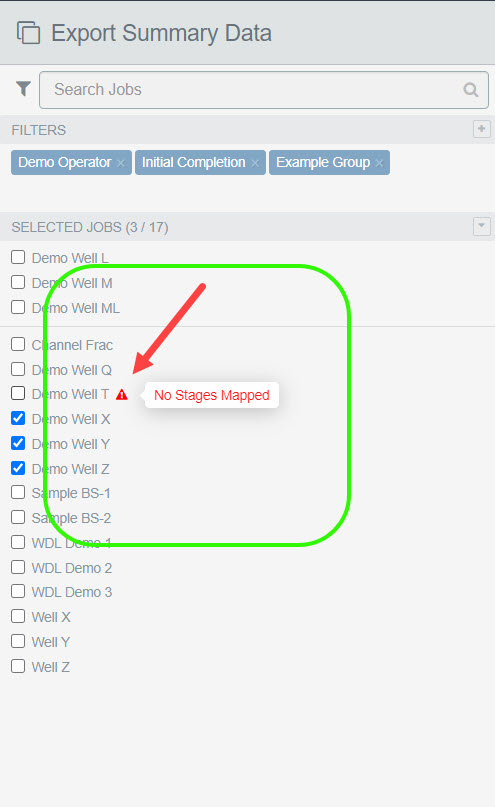
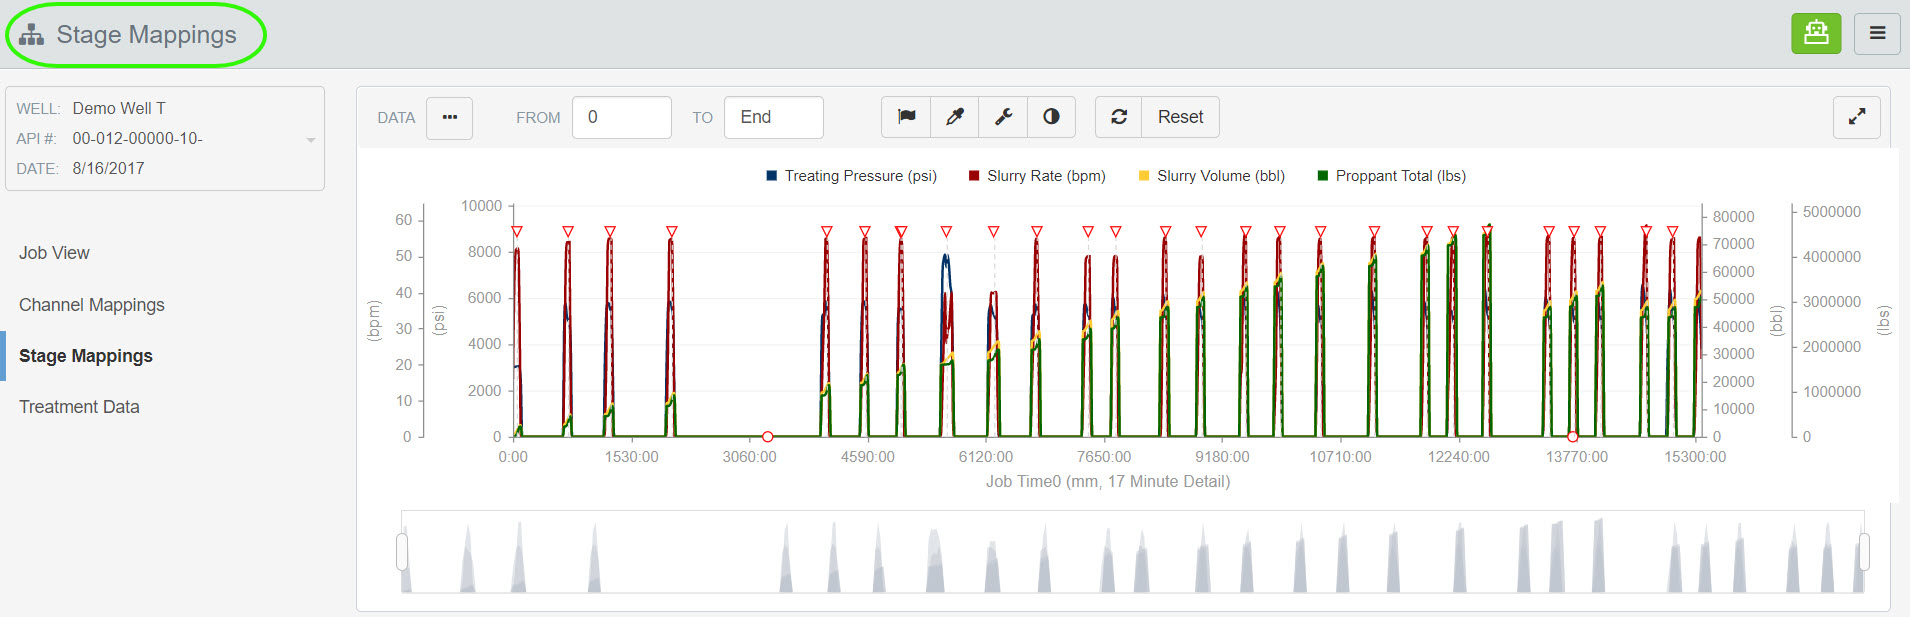
** Note: You may have noticed the red warning triangle next to the Demo Well T job in the filters section above. If any jobs in your Selected Jobs list need to have Stage Start and Stage End times set, red warning triangles will call out those jobs and clicking on the red triangle will take you to the Stage Mappings page where you can complete the process.
Once your stages have been mapped, you can build your reports to show the stage level data, just the job totals, or the whole enchilada! And finally, Well Data Labs will export your report in your desired format so you can take it directly into a meeting or import the data into Spotfire for further analysis.
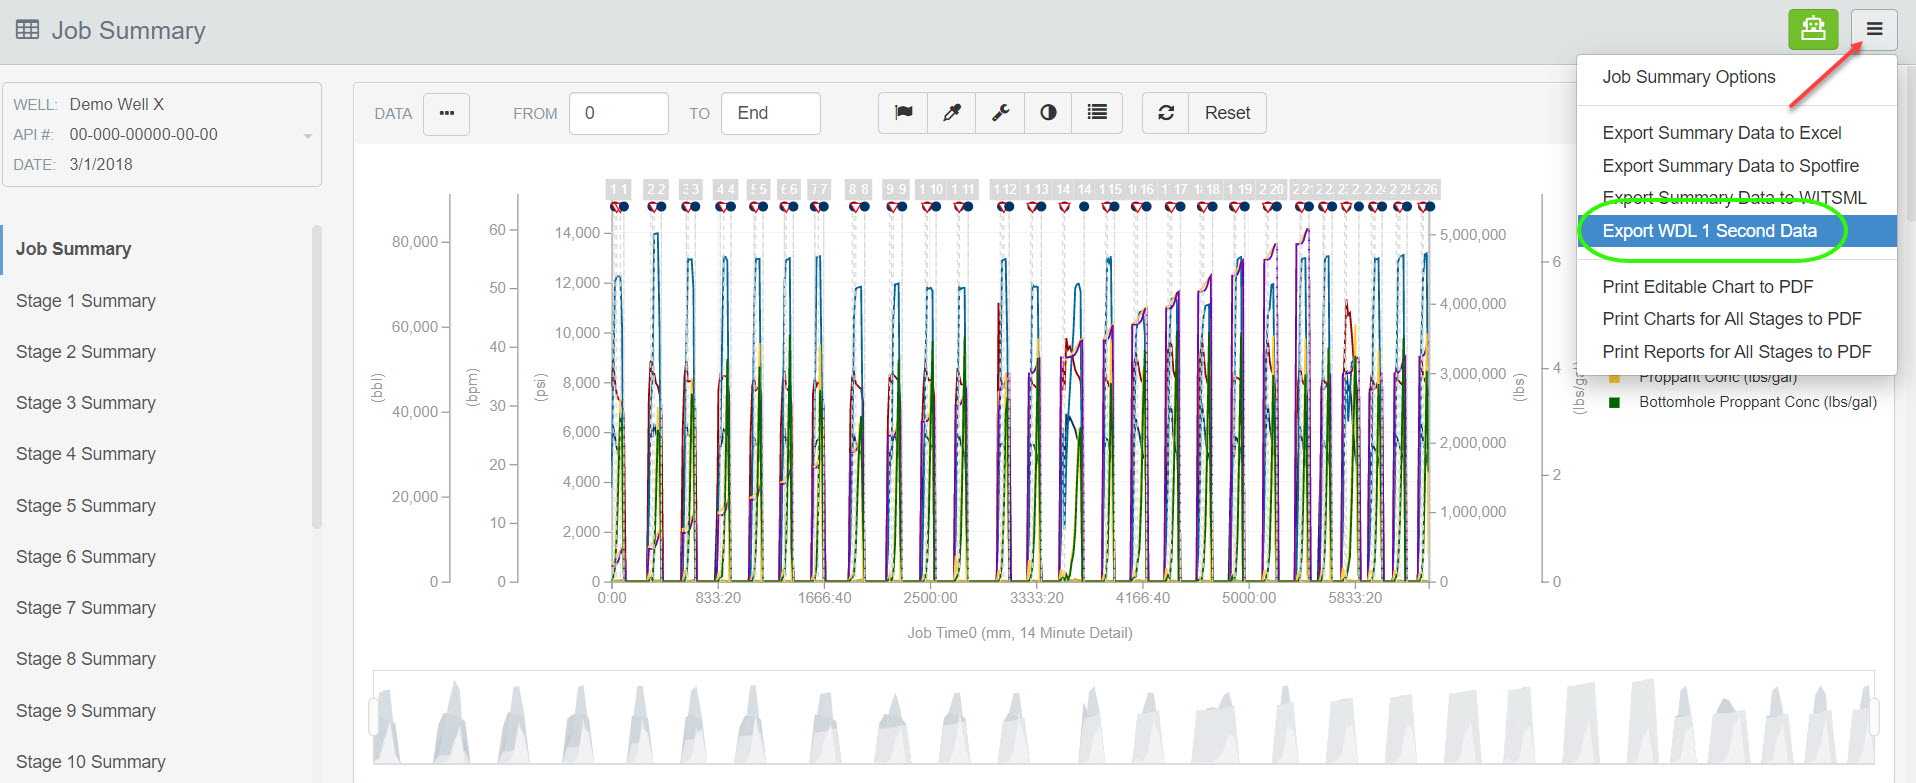
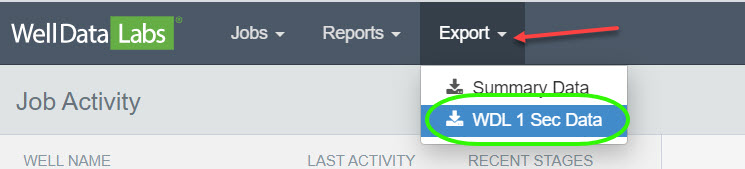
Exporting WDL 1 Second Data
There are a couple of ways you can Export WDL 1 Second Data. If you are on the Job Summary page, click on the 3-bar button and select Export WDL 1 Second Data or, from the Export drop-down found on the toolbar, select WDL 1 Sec Data.
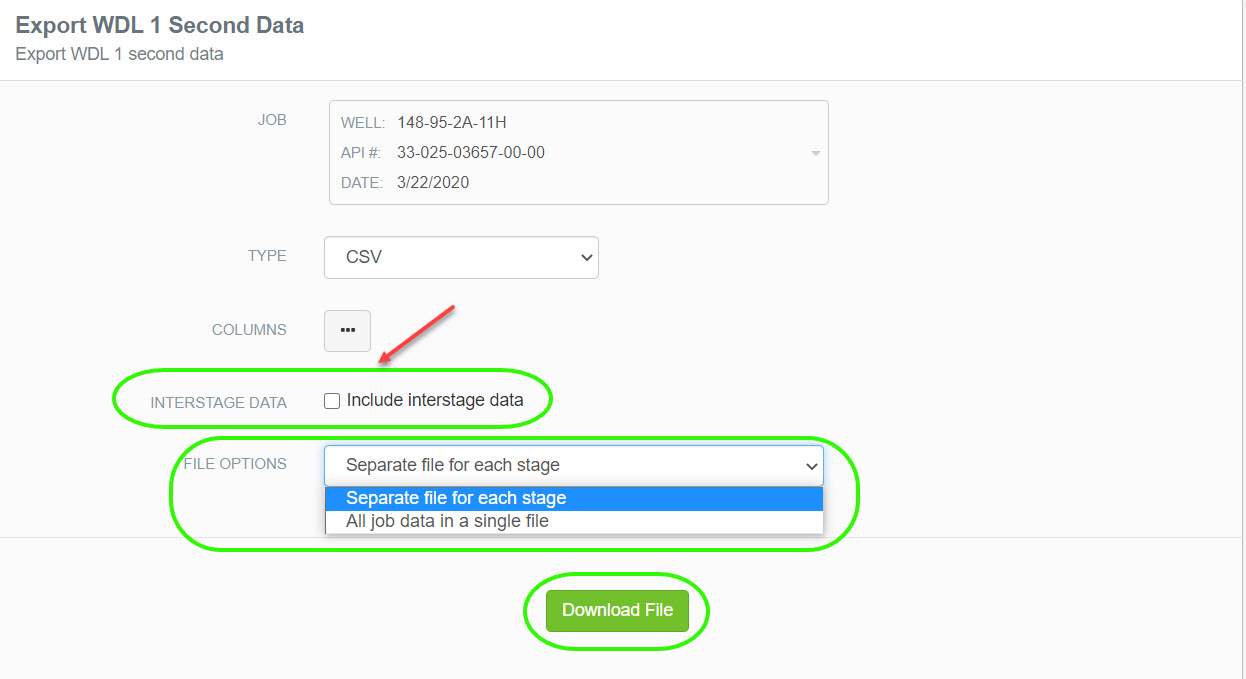
Both options will display an Export WDL 1 Second Data window where you can select what you would like to be included in the file.
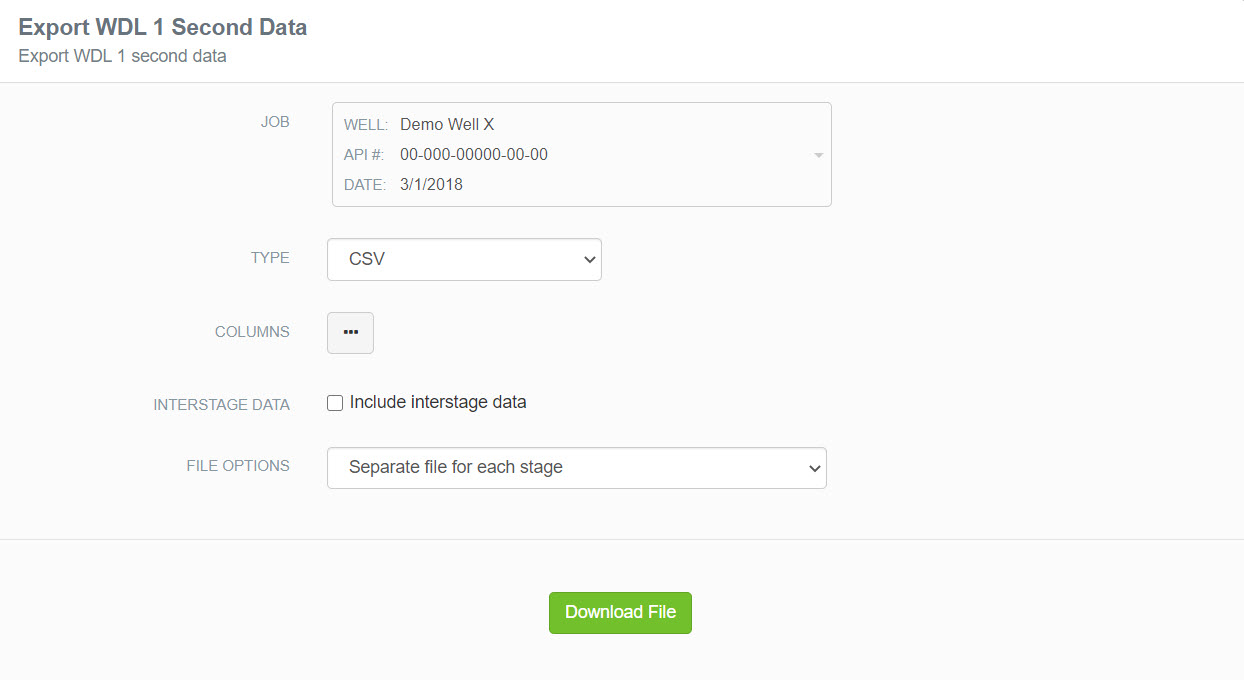
Click on the 3-dot button next to Columns to make a selection. The default is set to Select All.
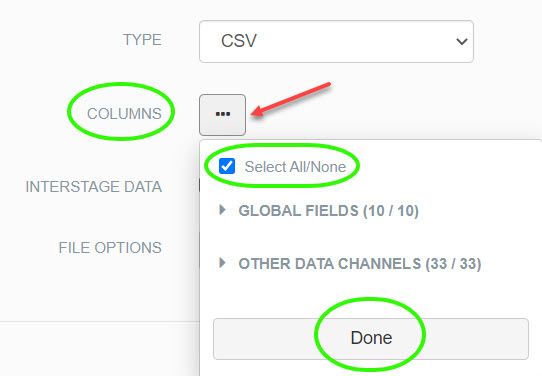
To make your own selections, deselect the Select All box and expand the Global Fields and Data Channels by clicking on the small arrow next to each one and clicking on the elements you would like to have included. Click Done when you are finished.

Next, you can select to have Interstage Data included and whether or not you would like a separate file for each stage or all of the job data to be in one file. Click Download File when you are finished.
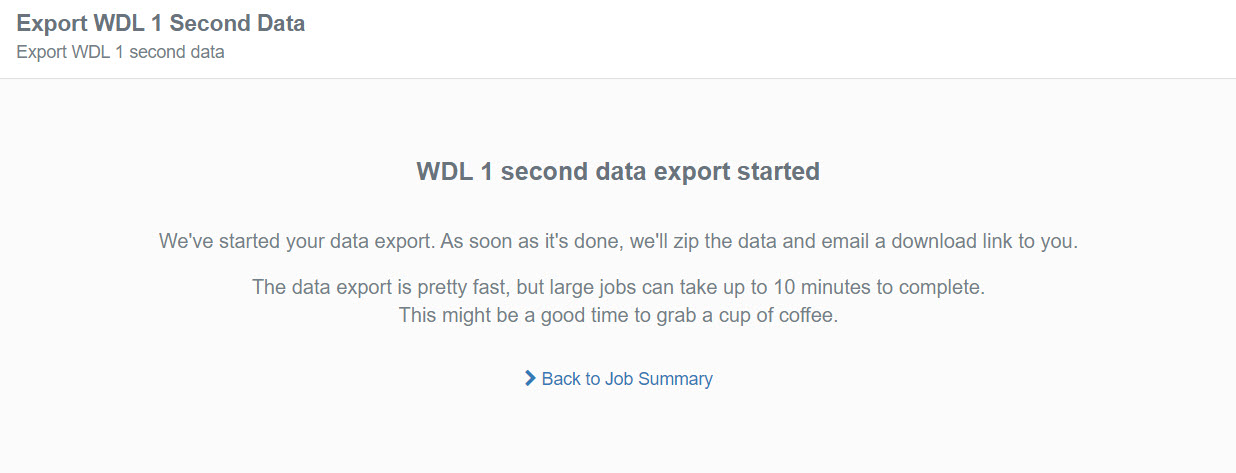
A window will display letting you know that the export has started. An email with the zipped file download information will be sent to your inbox.
And finally, Well Data Labs will export your report in your desired format so you can take it directly into a meeting or import the data into Spotfire for further analysis.
If you have any questions or need help exporting your data, contact support and we will be happy to help!