Well Data Labs Real-Time Frac
WDL Real-Time ClientLite Quickstart Guide
Last updated on 27 Oct, 2025
Open the Client Application
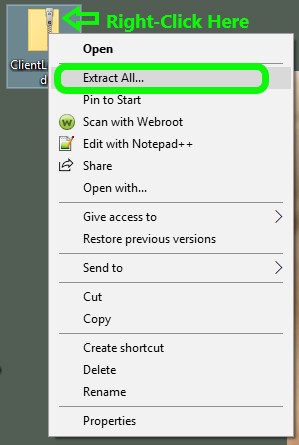
If your ClientLite file is still compressed and zipped up, right-click on the file and select ‘Extract All…’ to unzip. A window should pop-up, now select where you would like the files to be located and click 'Extract'.
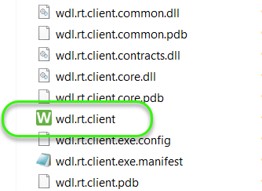
Open the unzipped ClientLite folder (located where you selected in the previous step). Double-click on the wdl.rt.client application file found within that ClientLite folder.
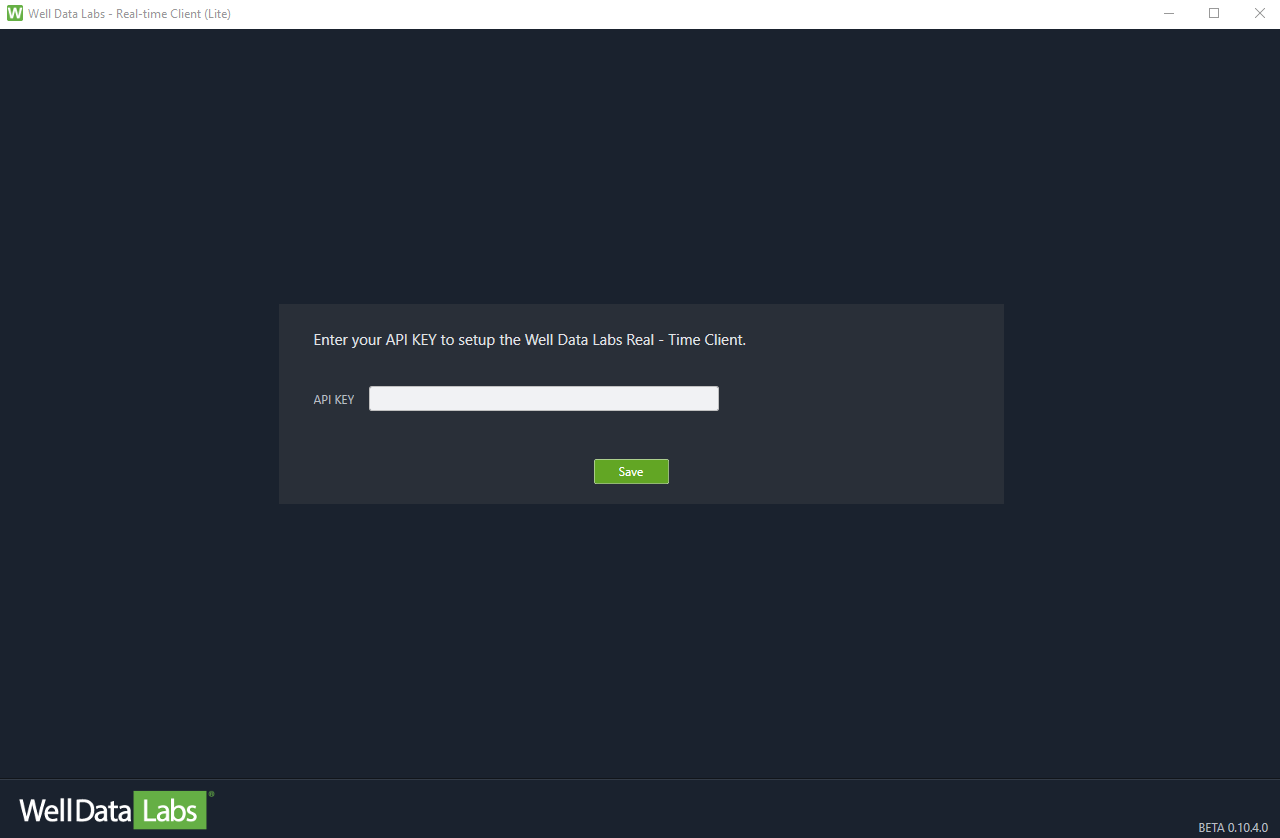
First-time Setup and API Key
The Real-Time Client will automatically launch and prompt you to enter your API KEY provided by Well Data Labs. This will be saved on your computer and should not need to be re-entered.
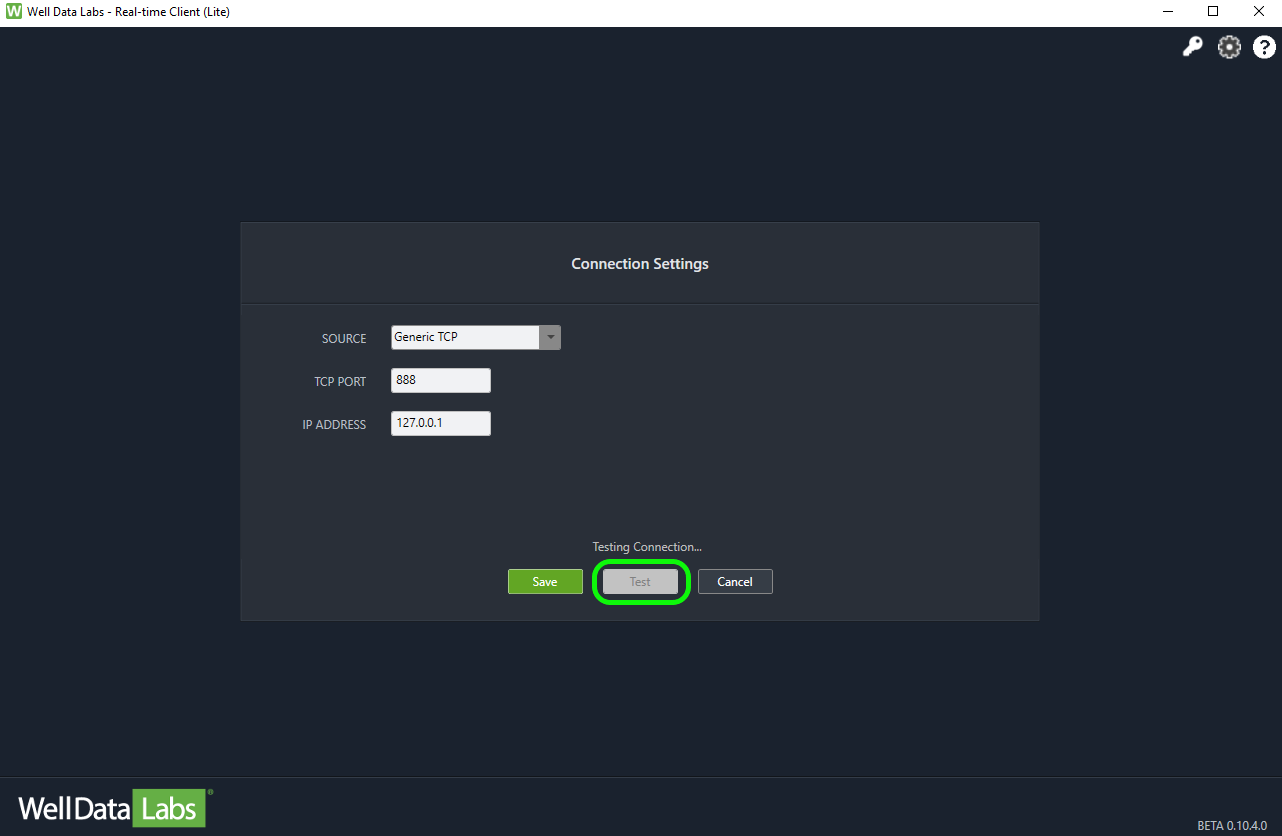
Select your Connection Type
There are 2 types of connections to the WDL Real-Time Client:
Generic TCP - utilizes Ethernet to connect to the local network. For this type of connection, you will need to input the TCP PORT where you are receiving data from, as well as the IP ADDRESS.
Generial RS232 (Serial) - utilizes a Serial Port connection to the van. You will need to choose which COM PORT on the local computer that data will be coming in on.
Testing your Connection
If you want to verify the presence of a data source, you can use the Test button. Please be aware that this does not guarantee that you are connected to the correct data source, only that one exists.
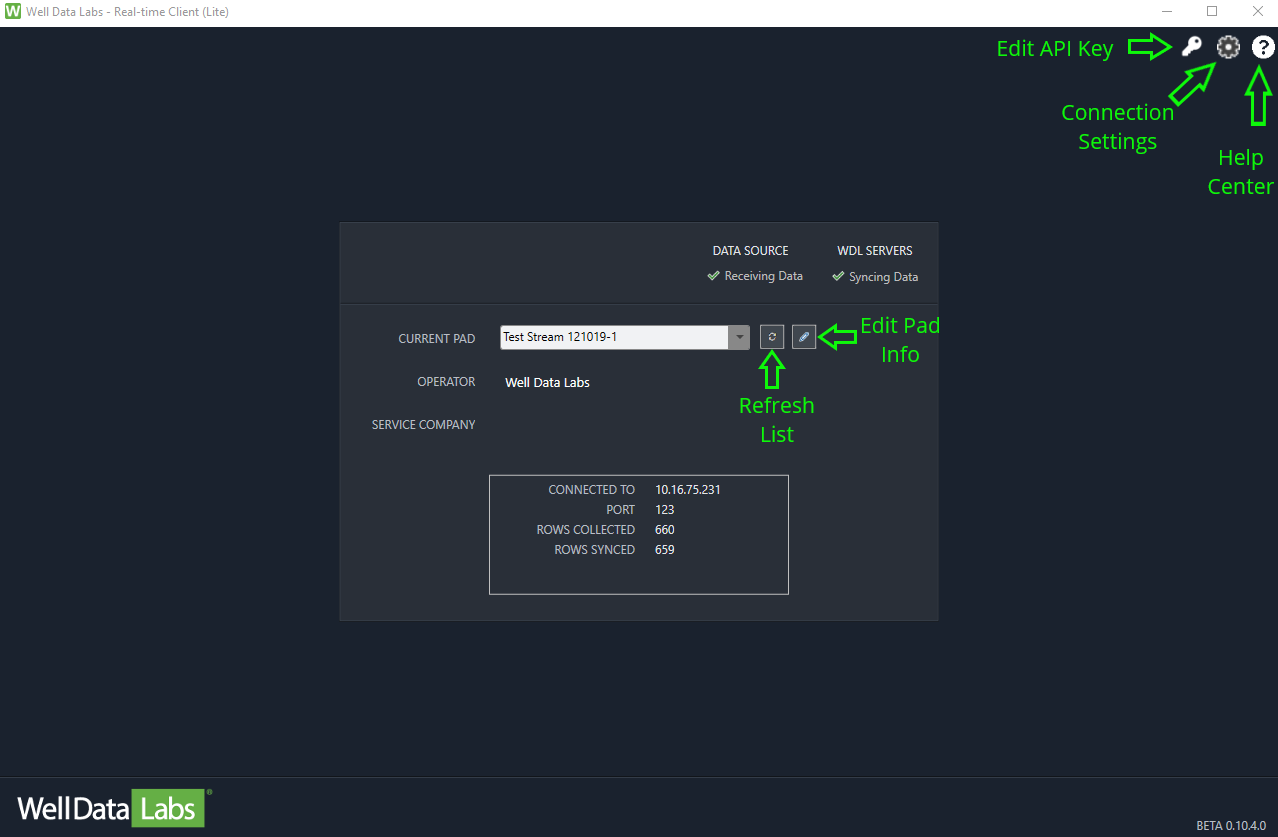
Once you click Save, if the Data Source is live and you have a connection to the internet, you'll now get green check marks for Data Source and WDL Servers.

Name and Configure your Pad
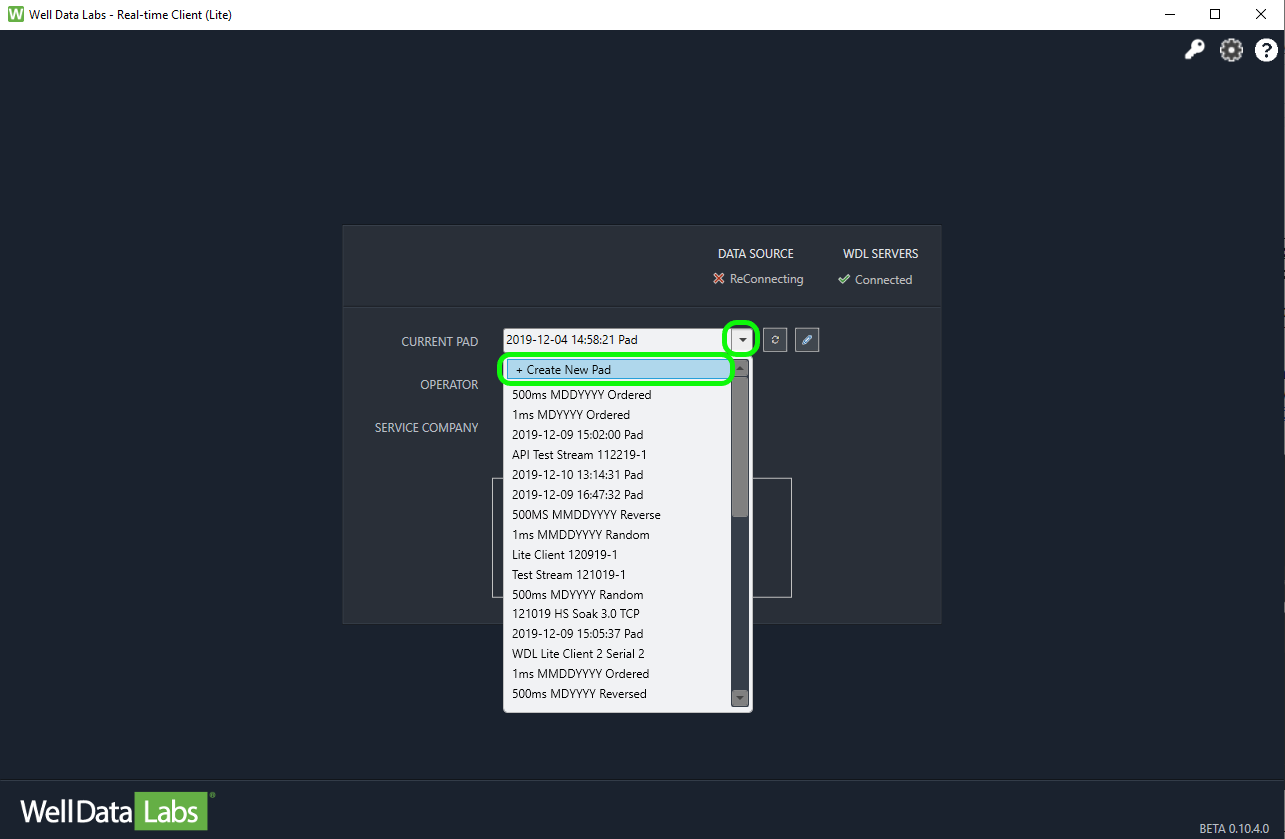
The WDL Real-Time Client will automatically start a new stream upon setup of a proper connection. You can either rename this stream using the edit icon, or create a new stream from the drop-down options. If you are attempting to resume a previous stream created by another client instance, you can click the refresh icon to update the list of jobs.
Create New Pad
Select the ‘+Create New Pad’ option from the Current Pad drop-down.
Contact WDL Support if you need any help or have questions!

